Skip to content
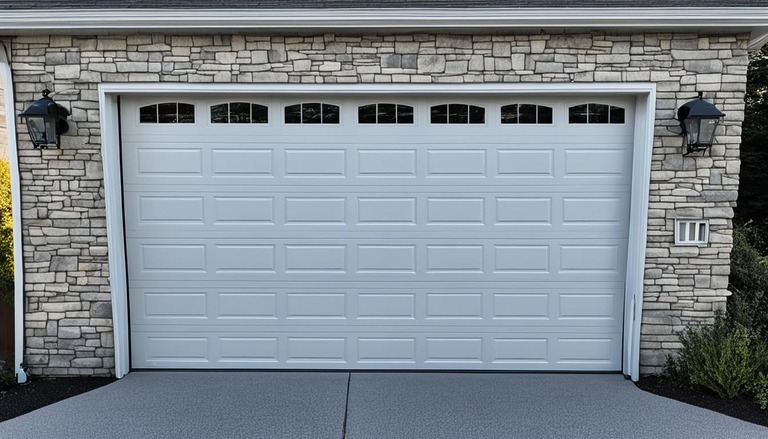
Are you considering upgrading your garage or taking on a new DIY project? One essential component of a smooth-operating garage door is the opener bracket. But do you know how to install garage door opener bracket? A well-installed opener bracket ensures your garage door’s stability and proper functioning, making it an essential step in any garage upgrade or DIY project.
This comprehensive guide will walk you through the step-by-step process of installing a garage door opener bracket. From choosing the right bracket to troubleshooting common issues, we’ve got you covered. Whether you’re an experienced DIY enthusiast or a first-time installer, this guide will provide all the information you need for a successful installation.
Key Takeaways:
- Installing a garage door opener bracket is crucial for a garage door to operate smoothly.
- Choose the right bracket for your needs, such as low headroom or quick turn brackets.
- Gather the necessary tools and materials before starting the installation process.
- If needed, prepare the garage door by fixing any existing bracket issues and installing a reinforcement bracket.
- Accurate measuring and marking are essential for a precise installation.
Choosing the Right Garage Door Opener Bracket
Before you begin the installation, selecting the appropriate garage door opener bracket that suits your specific requirements is crucial. Depending on your garage door configuration and preferences, you may need to consider different types of brackets, including low headroom and quick turn brackets. Understanding the features and benefits of each option will guide you in making an informed decision for your garage door.
In order to choose the most suitable garage door opener bracket, it’s essential to consider factors such as:
- The height and clearance of your garage door
- The type and weight of the garage door
- The level of noise insulation desired
- The ease of installation
Low headroom garage door brackets are specifically designed for garages with limited ceiling or headroom space. These brackets provide a solution for installations where there is insufficient space for a standard bracket. They allow for optimal clearance and smooth operation even in low headroom areas.
Quick turn garage door brackets are designed for faster and more efficient installation. These brackets feature a unique design that allows for quick adjustment and alignment during the installation process. With quick turn brackets, you can save time and effort while ensuring a secure and reliable attachment to your garage door.
By carefully assessing your garage door requirements and understanding the features of different types of brackets, you can confidently choose the right garage door opener bracket for a successful installation. Making the right choice will not only enhance the functionality of your garage door but also provide you with peace of mind knowing that your garage door system is well-supported and optimized for long-term performance.
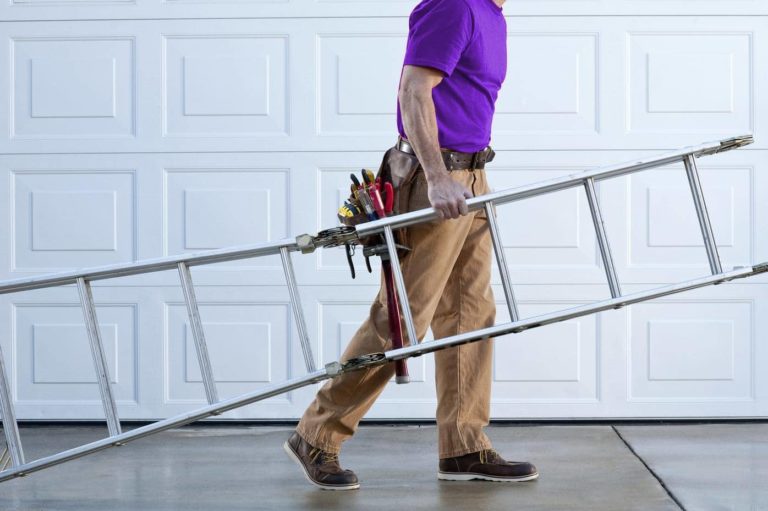
Tools and Materials Needed
To successfully install a garage door opener bracket, you will need a set of essential tools and materials. Having these items on hand will ensure a seamless installation process. Here is a list of what you will need:
- Measuring Tape: This tool is crucial for accurate measurements and marking.
- Power Drill: A drill will be necessary for drilling pilot holes and attaching the bracket securely.
- Screwdriver: Depending on the type of screws used, you may need a Phillips or flat-head screwdriver.
- Adjustable Wrench: An adjustable wrench will come in handy for tightening nuts and bolts.
- Level: A level will help ensure that the bracket is installed straight and aligned correctly.
- Pencil: A pencil will be used to mark the measurements on the garage door.
- Safety Glasses: It’s important to protect your eyes during the installation process.
In addition to the tools, you will also need the following materials:
- Garage Door Opener Bracket: Choose a bracket that is compatible with your specific garage door and opener.
- Mounting Hardware: This includes screws, nuts, and bolts needed to attach the bracket to the garage door.
- Garage Door Reinforcement Bracket: If your garage door requires additional support, you may need a reinforcement bracket for added stability.
- Lubricant: Lubricant will help keep the moving parts of the garage door and opener functioning smoothly.
Having these tools and materials readily available will make the installation process efficient and ensure a successful outcome.
| Tools | Materials |
|---|---|
| Measuring Tape | Garage Door Opener Bracket |
| Power Drill | Mounting Hardware |
| Screwdriver | Garage Door Reinforcement Bracket |
| Adjustable Wrench | Lubricant |
| Level | |
| Pencil | |
| Safety Glasses |
“Having the right tools and materials is essential for a successful garage door opener bracket installation. Make sure you have everything you need before getting started.”
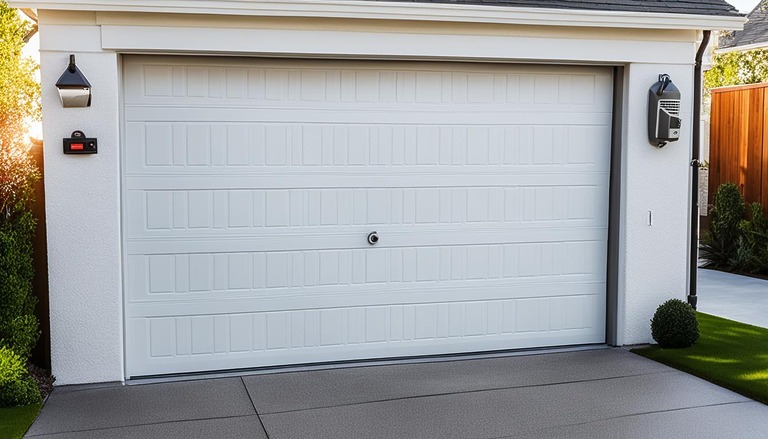
Preparing the Garage Door
Before proceeding with the installation of the garage door opener bracket, it is essential to prepare the garage door to ensure a successful and sturdy installation. This section will guide you through the necessary steps to fix any existing bracket issues and provide additional reinforcement for added stability.
1. Fixing Broken or Damaged Brackets
If you have any broken or damaged brackets on your garage door, it is crucial to address these issues before installing the opener bracket. Ignoring broken or damaged brackets can compromise the functionality and safety of your garage door. Follow these steps to fix broken or damaged brackets:
- Inspect the brackets: Carefully examine all the brackets on your garage door to identify any signs of damage, such as cracks or bent sections.
- Remove the damaged brackets: Using the appropriate tools, carefully remove the broken or damaged brackets from the garage door. Be cautious while removing the brackets to avoid causing further damage.
- Replace the brackets: Purchase new brackets that match the specifications of your garage door. Install the new brackets according to the manufacturer’s instructions, ensuring a secure and proper fit.
2. Installing a Reinforcement Bracket
In addition to fixing any existing bracket issues, it is recommended to install a reinforcement bracket for enhanced stability and durability. A reinforcement bracket can help distribute the stress and weight of the garage door opener more evenly, reducing the strain on the existing brackets. Follow these steps to install a reinforcement bracket:
- Choose the appropriate reinforcement bracket: Select a reinforcement bracket that is compatible with your garage door and opener system. Consult the manufacturer’s guidelines or seek professional advice if unsure.
- Position the reinforcement bracket: Place the reinforcement bracket in the desired location on the top section of the garage door, ensuring proper alignment with the existing brackets.
- Secure the reinforcement bracket: Using the provided hardware and following the manufacturer’s instructions, securely fasten the reinforcement bracket to the garage door. Double-check the tightness of the screws to avoid any potential issues in the future.
By addressing any broken or damaged brackets and installing a reinforcement bracket, you can ensure that your garage door is ready to accommodate the opener bracket installation. This preparation will contribute to a sturdy and reliable garage door system.
Measuring and Marking
Accurate measurements and markings are crucial when installing a garage door opener bracket. These steps ensure that the bracket is correctly positioned and aligned for optimal functionality. Follow the instructions below to measure and mark the precise locations for mounting the bracket:
- Measure the distance: Begin by measuring the distance between the top of the garage door and the ceiling. This measurement will determine the height at which the bracket should be installed.
- Find the centerline: Locate the centerline of the garage door by measuring the width and dividing it in half. Mark this centerline on the top of the door using a pencil or marker.
- Align the bracket: Position the bracket on the centerline, ensuring that it aligns with the top edge of the door. Use a level to ensure the bracket is perfectly horizontal.
- Mark the screw holes: Once the bracket is in the desired position, mark the locations of the screw holes on the garage door. These marks will serve as a guide for drilling and fastening the bracket securely.
Remember to double-check your measurements and markings before proceeding further. This will help avoid any errors during the installation process. Take your time and ensure that everything is accurately marked and aligned.
Pro Tip: When making your markings, it’s best to use a pencil or marker with a fine tip for precision. This will make it easier to see and follow your markings as you progress with the installation.
With the measuring and marking steps completed, you are now ready to move on to the next section of the installation process.

| Measurement | Description |
|---|---|
| Distance between top of garage door and ceiling | Measured to determine bracket installation height |
| Centerline of the garage door | Located by measuring width and dividing by 2 |
| Position of screw holes | Marked on the garage door to guide drilling and fastening |
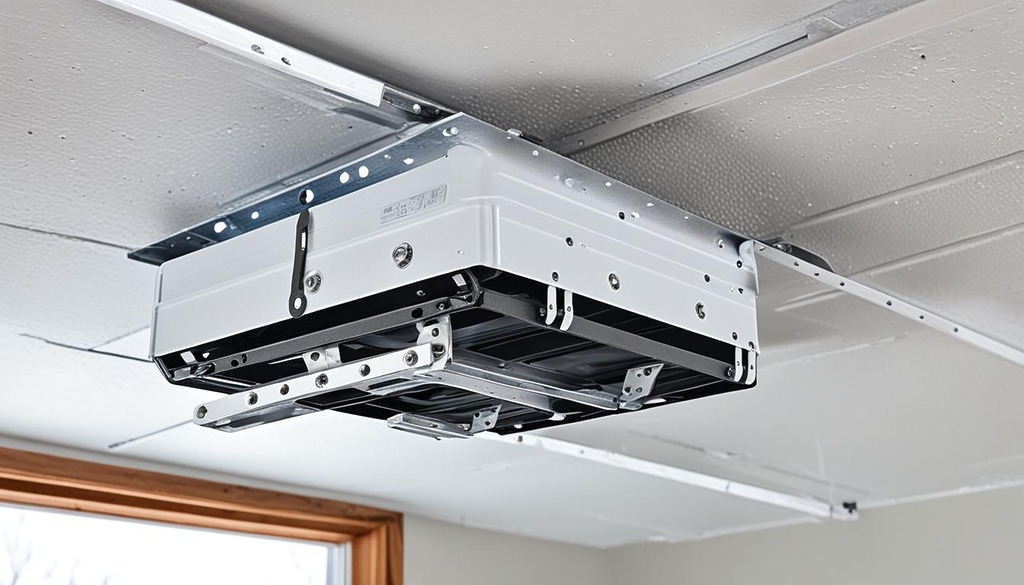
Attaching the Bracket to the Garage Door
Once you have prepared the garage door and completed the measurements, it’s time to attach the opener bracket. This step is crucial for ensuring the smooth and secure operation of your garage door. Whether you are installing a new bracket or replacing an existing one, following the proper techniques is essential.
Before attaching the bracket, make sure you have selected the correct bracket type for your garage door opener. Different brands and models may require specific bracket designs, so refer to the manufacturer’s instructions or consult a professional if needed.
To attach the bracket, follow these steps:
- Position the opener bracket in the designated location on the garage door. Ensure that it is aligned with the holes on the bracket and the holes on the garage door.
- Using a power drill or screwdriver, insert the mounting screws through the bracket holes and into the corresponding holes on the garage door.
- Tighten the screws securely but avoid over-tightening, as it may damage the bracket or the garage door.
- Double-check the alignment of the bracket and ensure that it is firmly attached.
If you are replacing an existing bracket, remove the old bracket carefully and clean the area before attaching the new one. Inspect the garage door for any signs of damage or wear that may have contributed to the bracket’s failure. Address these issues before proceeding with the installation.
Remember, the proper attachment of the bracket is crucial for the safe and efficient operation of your garage door opener. Take the time to ensure its secure installation, and if you have any doubts or concerns, consult a professional.
Proper installation of the garage door opener bracket ensures the reliable function of your garage door and enhances overall safety and security.
Connecting the Opener Arm to the Bracket
Once you have securely attached the garage door opener bracket, the next step is to connect the opener arm. This crucial step ensures the smooth operation of your garage door. Additionally, it is an opportunity to fix any issues with the garage door arm bracket that may affect its performance.
To connect the opener arm to the bracket, follow these steps:
- Inspect the Opener Arm: Before proceeding, carefully check the opener arm for any signs of damage or wear. Replace it if necessary to ensure optimal performance.
- Position the Opener Arm: Align the opener arm with the bracket, ensuring that it fits securely and properly.
- Secure the Opener Arm: Attach the opener arm to the bracket using the provided hardware. Follow the manufacturer’s instructions for the specific type of opener arm and bracket you are using.
- Adjust and Test: After connecting the opener arm, conduct a quick test to ensure it moves smoothly and operates correctly. Make any necessary adjustments to achieve the desired functionality.
By following these steps, you can connect the opener arm to the garage door opener bracket effectively. This connection is crucial for the proper functioning of your garage door system.
If you encounter any issues or difficulties during this process, consult the manufacturer’s instructions or seek professional assistance. It is essential to prioritize safety and precision when connecting the opener arm to the bracket.
Remember, a securely connected opener arm ensures the reliable and efficient operation of your garage door. Take your time, follow the steps carefully, and enjoy the benefits of a well-functioning garage door system.
Expert Tip:
Regular maintenance of the opener arm and bracket is key to extending their lifespan and preventing unnecessary repair costs. Be sure to inspect and lubricate these components periodically to keep everything in optimal condition.
| Steps to Connect the Opener Arm | Benefits |
|---|---|
| 1. Inspect the Opener Arm | – Ensures proper functionality – Identifies any potential issues |
| 2. Position the Opener Arm | – Proper alignment with the bracket – Enhances stability and performance |
| 3. Secure the Opener Arm | – Prevents loosening or detachment – Allows smooth operation |
| 4. Adjust and Test | – Optimizes functionality – Validates smooth operation |
Testing the Opener Bracket and Arm
To ensure the successful installation of the garage door opener bracket, it is crucial to test its functionality. Testing the opener bracket and arm will help identify any issues and ensure smooth operation before completing the installation. Follow the steps below to carry out the necessary tests:
1. Test the Opener Bracket:
- Activate the opener to raise and lower the garage door.
- Observe the bracket’s performance and check for any unusual noises, vibrations, or jerky movements.
- Ensure that the bracket is securely attached and that there is no excessive slack or movement.
2. Test the Opener Arm:
- Activate the opener to raise the garage door.
- Observe the arm’s movement and check for smooth operation without any obstructions or resistance.
- Ensure that the arm is properly connected to the bracket and that there is no excessive play or misalignment.
If you encounter any issues during the testing process, refer back to the previous sections of this guide to identify and troubleshoot the problem. By thoroughly testing the opener bracket and arm, you can ensure that your garage door operates smoothly and safely.
Troubleshooting Common Issues
During the installation process of a garage door opener bracket, it’s not uncommon to encounter certain issues that may affect the smooth operation of your garage door. In this section, we will discuss some common problems and provide troubleshooting tips to help you fix them effectively.
Misalignment
One of the primary issues you may face is misalignment between the garage door opener bracket and the door itself. This can occur due to improper measurements or incorrect installation. To troubleshoot this issue, follow these steps:
- Inspect the alignment of the bracket and make sure it is parallel to the door.
- Adjust the position of the bracket by loosening the mounting screws and repositioning it accordingly.
- Use a level to ensure the bracket is perfectly horizontal.
- Tighten the mounting screws securely.
Loose Brackets
Another common issue is loose brackets, which can lead to noisy and unstable garage door operation. If you notice loose brackets, here’s how you can troubleshoot the problem:
- Tighten the screws or bolts that secure the bracket to the garage door frame.
- Check for any signs of wear or damage on the brackets. If necessary, replace them with new ones.
- Ensure that all screws and bolts are tightened properly, but be cautious not to overtighten them, as it may cause damage.
Stuck Garage Door
If your garage door gets stuck during the opening or closing process, it could be due to various reasons. Here are a few troubleshooting steps to help you resolve this issue:
- Inspect the track and rollers for any debris or obstructions. Remove any objects that may be hindering the smooth movement of the door.
- Check the alignment of the track. If it is misaligned, use a rubber mallet to gently tap it back into position.
- Apply lubricant to the rollers, hinges, and tracks to ensure smooth operation.
Remember, if the troubleshooting tips provided above do not resolve the issue or if you are unsure about the correct course of action, it is advisable to consult a professional garage door technician for expert assistance.
By effectively troubleshooting these common issues, you can ensure that your garage door opener bracket functions optimally, providing you with a reliable and safe garage door system.
Replacing Garage Door Bottom Roller Bracket
If you find yourself needing to replace the garage door bottom roller bracket during the installation process, follow these step-by-step instructions to ensure a seamless replacement. By safely removing the old bracket and properly installing the new one, you’ll optimize the performance of your garage door.
Step 1: Safely Removing the Old Bracket
Before installing the new roller bracket, it’s crucial to safely remove the old one. Start by disconnecting the opener arm from the bracket. Then, use a wrench or socket set to remove the bolts or screws securing the bracket to the garage door. Carefully detach the old bracket, ensuring not to damage any surrounding components.
Step 2: Properly Installing the New Bracket
Once the old bracket is removed, it’s time to install the new garage door bottom roller bracket. Begin by positioning the new bracket in the same location where the old one was. Ensure that the bracket is aligned properly with the existing holes on the garage door. Use a socket set or wrench to secure the new bracket in place with the appropriate bolts or screws.
Step 3: Testing the Replacement
After installing the new garage door bottom roller bracket, it’s important to test its functionality. Operate the garage door opener to ensure smooth and proper movement of the door. Listen for any unusual noises or vibrations and observe the door’s alignment during operation. If there are any issues, make sure the bracket is securely attached and consult the troubleshooting section for further guidance.
Remember, if you encounter any difficulties during the replacement process, it’s recommended to consult a professional garage door technician for assistance. They have the expertise and tools needed to ensure a safe and effective replacement.
Additional Tips for a Smooth Installation
In addition to the step-by-step instructions provided earlier, here are some extra tips and recommendations to ensure a seamless installation process for your garage door opener bracket:
- Measure Twice, Cut Once: Before making any cuts or adjustments, double-check your measurements to ensure accuracy. This will help you avoid unnecessary mistakes and rework.
- Secure all Hardware: Make sure to tighten all screws, bolts, and nuts securely. Loose hardware can cause instability and affect the performance of your garage door opener bracket.
- Use Proper Safety Equipment: Always prioritize safety and wear appropriate protective gear, such as gloves and safety glasses, when handling tools and materials.
- Follow Manufacturer Instructions: Read and follow the manufacturer’s instructions carefully. Each garage door opener bracket may have specific requirements and installation steps that need to be followed for optimal performance.
- Test the Door Balance: After installing the bracket, test the balance of your garage door. An unbalanced door can put unnecessary strain on the opener bracket and lead to premature wear and tear.
- Inspect Regularly: Once the installation is complete, periodically inspect the garage door opener bracket for any signs of damage or wear. Timely maintenance and repairs can prevent larger issues down the line.
By following these additional tips, you can enhance the installation process and ensure that your garage door opener bracket is securely installed. Remember, a properly installed bracket is crucial for the smooth and reliable operation of your garage door.

Maintaining Your Garage Door Opener Bracket
Proper maintenance is crucial for ensuring the longevity and optimal performance of your garage door opener bracket. By following routine maintenance tasks and promptly addressing any damage, you can extend the lifespan of your bracket and avoid costly repairs or replacements.
Routine Maintenance Tasks
Regular inspection and maintenance of your garage door opener bracket are essential to identify and address any issues before they escalate. Here are some routine maintenance tasks that you should include in your garage door maintenance checklist:
- Regularly clean the bracket using a mild detergent and water solution to remove dirt, dust, and debris that can accumulate over time. Avoid using harsh chemicals as they may damage the bracket.
- Check the brackets for any signs of wear and tear, such as cracks or bent components. If you notice any damage, promptly repair or replace the affected parts to maintain the structural integrity of the bracket.
- Lubricate the moving parts of the bracket, including hinges and rollers, with a silicone-based lubricant. This will help reduce friction and ensure smooth operation.
- Inspect the mounting screws and bolts to ensure they are securely tightened. Loose fasteners can cause the bracket to shift or become unstable, affecting the overall performance of your garage door.
Repairing the Garage Door Opener Bracket
Over time, your garage door opener bracket may experience wear and tear or sustain damage. It’s important to address these issues promptly to prevent further damage and ensure the safety and functionality of your garage door. Here’s a step-by-step guide to repairing a damaged garage door opener bracket:
- Begin by disconnecting the garage door opener from the power source to prevent any accidental activation during the repair process.
- Inspect the bracket for any visible damage, such as cracks or bent components. If the damage is minor, you may be able to repair it by reinforcing the affected area with sturdy adhesive or using metal brackets.
- If the damage is significant or the bracket is beyond repair, you will need to replace it. Consult the manufacturer’s guidelines or seek professional assistance to ensure you select the appropriate replacement bracket for your specific garage door model.
- Once you have the new bracket, follow the manufacturer’s instructions to install it securely, ensuring proper alignment and attachment to the garage door.
- Reconnect the garage door opener to the power source and test the functionality of the repaired or replaced bracket to ensure smooth operation.
By regularly maintaining and promptly repairing any damage to your garage door opener bracket, you can ensure its optimal performance and prolong its lifespan. Remember to consult the manufacturer’s guidelines or seek professional assistance whenever necessary to ensure safety and proper installation.
Conclusion
Installing a garage door opener bracket may seem like a challenging task, but with the right guidance and tools, it can be easily accomplished. This comprehensive guide has provided you with all the necessary information to successfully complete the installation.
By following the step-by-step instructions outlined in this guide, you can streamline your DIY project and upgrade your garage. The proper selection of the right garage door opener bracket, accurate measurements and markings, secure attachment, and thorough testing are crucial to ensure optimal functionality.
Remember to prioritize safety throughout the installation process and address any common issues that may arise with the help of the troubleshooting tips provided. Additionally, make sure to maintain your garage door opener bracket regularly to prolong its lifespan and address any maintenance or repair needs promptly.
With this easy guide, you can confidently install a garage door opener bracket and enjoy the benefits of a smoothly operating garage door. So grab your tools, follow the instructions, and embark on this rewarding DIY project to enhance your garage!
FAQ
How to install a garage door opener bracket?
To install a garage door opener bracket, follow these steps:
1. Choose the right garage door opener bracket for your specific needs.
2. Gather the necessary tools and materials.
3. Prepare the garage door by fixing any existing bracket issues and installing a reinforcement bracket if needed.
4. Measure and mark the precise locations for mounting the bracket.
5. Attach the bracket securely to the garage door, either installing a new bracket or replacing an existing one.
6. Connect the opener arm to the bracket, ensuring a smooth connection.
7. Test the opener bracket and arm for functionality before completing the installation.
8. Troubleshoot any common issues that may arise during the installation process.
9. If necessary, replace the garage door bottom roller bracket.
10. Follow additional tips for a smoother installation.
11. Maintain the garage door opener bracket to ensure optimal performance and address any repairs that may be needed.
How do I choose the right garage door opener bracket?
Choosing the right garage door opener bracket involves considering factors such as the type of garage door you have and your specific requirements. Some common types of brackets include low headroom brackets, quick turn brackets, and reinforcement brackets. Evaluate your garage door’s height, clearance requirements, and any necessary modifications. Additionally, consult the manufacturer’s guidelines and seek professional advice if needed.
What tools and materials are needed to install a garage door opener bracket?
Tools and materials needed for installing a garage door opener bracket may include:
– Drill
– Screwdriver
– Level
– Tape measure
– Pencil or marker
– Wrench
– Garage door brackets
– Nuts, bolts, and screws
– Reinforcement brackets (if necessary)
How do I prepare the garage door before installing the opener bracket?
Before installing the opener bracket, prepare the garage door by addressing any existing bracket issues. Check for broken or damaged brackets and replace them if necessary. Additionally, consider installing a reinforcement bracket for added stability and support.
How do I measure and mark the garage door for the opener bracket?
Measuring and marking the precise locations for mounting the opener bracket is crucial. Use a tape measure to accurately determine the positions for mounting. Mark the spots with a pencil or marker, ensuring they align with the manufacturer’s guidelines and provide sufficient clearance for the door and opener system.
How do I attach the opener bracket to the garage door?
To attach the opener bracket to the garage door:
1. Align the bracket with the marked positions on the door.
2. Use a drill to create pilot holes for the screws.
3. Securely attach the bracket to the door using the provided screws or bolts.
4. Ensure the bracket is level and tightly fastened to provide stability and support for the opener system.
How do I connect the opener arm to the bracket?
To connect the opener arm to the bracket:
1. Position the opener arm so that it aligns with the bracket’s connector.
2. Insert the opener arm into the bracket’s connector.
3. Make sure the connection is secure and tight, allowing for smooth operation of the door.
How do I test the opener bracket and arm?
To test the opener bracket and arm:
1. Activate the opener system and observe the bracket and arm in motion.
2. Ensure that the bracket remains securely fastened and the arm moves smoothly without any sticking or jamming.
3. Test the door’s functionality by opening and closing it to verify that the bracket and arm can handle the weight and movement effectively.
What are some common issues that may arise during the installation process?
Common issues that may arise during the installation process include misalignment of the bracket, loose or improper connections, unlevel installation, and difficulties with securing the bracket or arm. For troubleshooting tips and solutions, consult the manufacturer’s guidelines, seek professional assistance, or refer to the additional tips provided in this guide.
How do I replace the garage door bottom roller bracket?
To replace the garage door bottom roller bracket:
1. Remove the old bracket by unscrewing or unbolting it from the door.
2. Install the new bracket in the same location, aligning it properly with the roller.
3. Securely attach the new bracket to the door using the appropriate screws or bolts.
4. Test the door’s functionality by opening and closing it to ensure smooth operation with the new bracket.
What are some additional tips for a smooth installation?
Here are some additional tips for a smooth installation:
– Read and follow the manufacturer’s guidelines and instructions carefully.
– Take safety precautions, such as turning off the power to the garage door opener while working.
– Seek assistance from a professional if you encounter any difficulties or are unsure about any step.
– Double-check all measurements, markings, and connections before proceeding.
– Use high-quality tools and materials for durability and reliability.
– Regularly maintain and inspect the opener bracket and arm for optimal performance.
How do I maintain my garage door opener bracket?
To maintain your garage door opener bracket:
1. Regularly inspect the bracket for any signs of damage or wear.
2. Clean the bracket and surrounding area to remove dirt and debris.
3. Lubricate the moving parts, such as hinges and rollers, as per the manufacturer’s recommendations.
4. Address any repairs promptly to prevent further damage and ensure smooth operation.
5. Follow the manufacturer’s maintenance guidelines and consult a professional if needed.