Skip to content
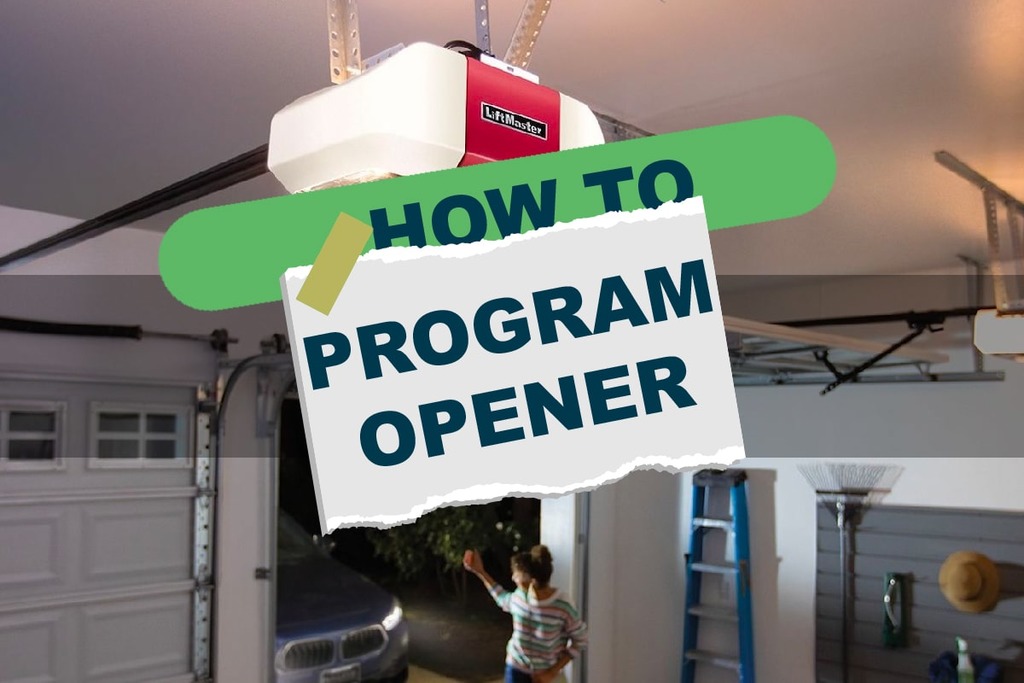
Table of Contents
Starting the journey of programming your garage door opener may seem daunting at first glance. But fear not. We’re here to make it a lot simpler for you. This guide, “How to program garage door opener” breaks down the process into manageable steps, making it less intimidating and more accessible. By following this guide, you can take on this task confidently and quickly, ultimately leading to a more efficient and convenient home setup. Whether new to DIY home tasks or a seasoned veteran, this guide is here to make your life easier. So, let’s dive into the step-by-step process of programming your garage door opener without further ado.
1. Gather Your Materials
Before we begin the actual programming process, it’s important to prepare by gathering all the necessary materials. This step is essential in ensuring a smooth and seamless operation. You’ll need your garage door remote control, which is the key instrument for this task. If you’re programming a new remote, ensure it has batteries installed.
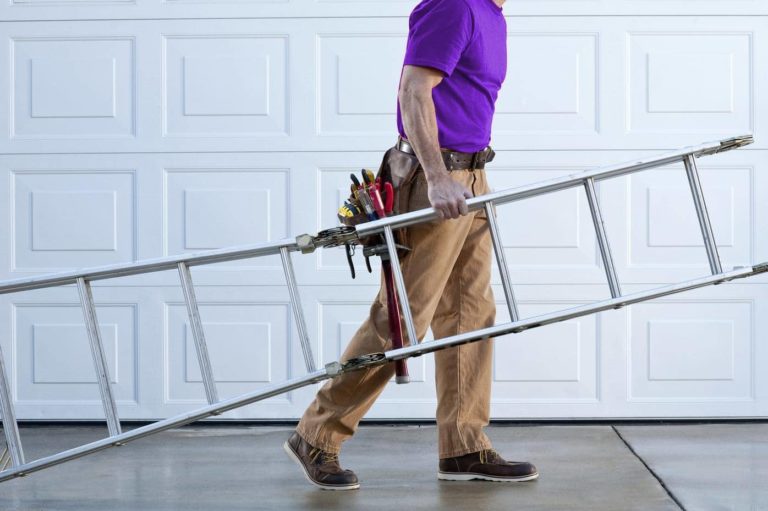
Additionally, you’ll need a stepladder. Why? The garage door opener – the actual mechanical device installed in your garage – often sits high above the ground, and the buttons you’ll need to access are located on it. A ladder ensures you can safely and easily reach the opener. Always prioritize safety when using a ladder and make sure it’s secure before climbing up.
By having these items ready before you start, you can avoid unnecessary interruptions once you’re in the middle of the process. This preparation brings you one step closer to a successfully programmed garage door opener. So, gather your remote, set up your ladder, and let’s move onto the next step!
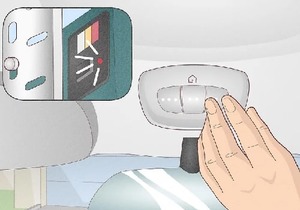
2. Locate the Learn Button
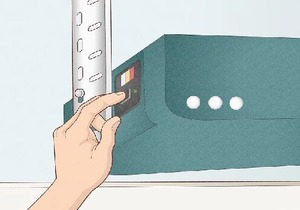
The next stage in our journey involves locating the ‘Learn’ or ‘Program’ button on your garage door opener unit. This is a crucial step as this button is the gateway to initiate the programming mode. The button is typically found on the back or the side of the unit, often encased within the light cover for protection.
Although it might seem like a simple task, due to the button’s small size and varying locations based on the make and model of the opener, it can sometimes pose a challenge. This is where your ladder comes into play. Safely ascend the ladder to gain a better vantage point of the opener. You might need to remove the light cover to expose the button.
Usually, the ‘Learn’ button is color-coded (commonly red, yellow, or purple) and clearly labeled, aiding you in identifying it amongst other components. Once you’ve successfully located the button, you’re all set to proceed to the next step – activating the programming mode. Remember, safety first when working at height. Ensure your ladder is stable before moving on to the next steps.
3. Initiate Programming Mode
Once you’ve located the ‘Learn’ or ‘Program’ button, you’re ready to dive into the heart of the process – initiating the programming mode. This stage forms the crux of the programming process and sets the stage for pairing your remote to the opener.
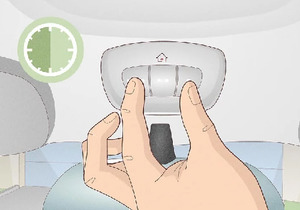
Start by firmly pressing and releasing the ‘Learn’ button. You’ll know you’ve activated the programming mode when the LED light adjacent to the button illuminates or starts blinking. This light serves as a visual confirmation that the opener is ready to be programmed, signaling you to proceed to the next step.
However, it’s crucial to act promptly at this point. The garage door opener remains in programming mode for about 30 seconds to a minute, depending on the model. If you exceed this time window, the opener will exit the programming mode, and you’ll need to start this step over.
Understanding this process and acting swiftly can make the difference between a frustrating or a successful programming experience. Now that your opener is eagerly waiting in programming mode, let’s quickly move on to linking it with your remote!
4. Program the Remote
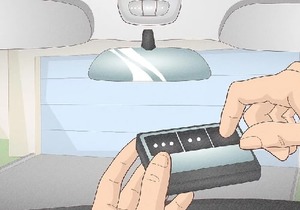
With your garage door opener in programming mode, it’s time to introduce your remote to the system. This part of the process involves the actual pairing of your remote and opener, creating the communication link between them.
Take your garage door remote and press the button you’ve designated for operating your door. In the case of multi-button remotes, you can assign different buttons for different doors or functionalities, but for now, focus on the primary button.
Some remotes may require you to hold down the button for a few seconds until the opener’s light blinks, or a click sound is heard. This blink or sound is a signal from your opener, indicating it has received the command from your remote and registered it.
This step marks the creation of a digital handshake between your remote and the opener. They’re now familiar with each other, and your remote command will be recognized and responded to by the opener.
Bear in mind that every garage door opener and remote pair can have slightly different programming steps. If the pairing isn’t successful, retrace your steps or refer to your product’s specific manual.
By now, you’ve completed the core of the programming process. Let’s now confirm your success by testing your freshly programmed remote!
5. Test Your Remote
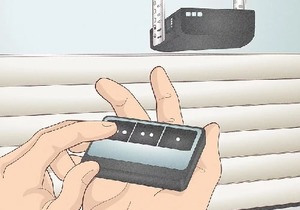
The moment of truth has arrived! Now that you’ve initiated your opener’s programming mode and paired your remote, it’s time to test the effectiveness of your efforts. This critical step allows you to confirm that the programming was successful and the remote can now operate your garage door as expected.
Take a step back and point your remote toward the garage door. Press the button you’ve programmed. Depending on its initial state, you should see the garage door respond by either opening or closing. If it does, you can pat yourself on the back. You’ve successfully programmed your garage door opener!
If the door doesn’t respond, don’t worry. Troubleshooting is a part of any technical process. You may need to repeat the programming steps, ensuring that you’re quick enough when pressing the remote button after the ‘Learn’ button and within the opener’s range.
Remember, patience is key here. You may not get it right on the first try, but you’ll get there with a bit of persistence. Once your remote passes this test, you’ll have achieved a new level of convenience in your daily life!
6. Resetting or Adding More Remotes
While successfully programming one remote is a milestone achievement, you might find yourself in a situation where you need to program additional remotes, or perhaps reset your opener due to a lost or malfunctioning remote. This section addresses those needs, ensuring you’re covered no matter the scenario.
The process of adding more remotes is quite similar to the steps we’ve already covered. Begin by pressing the ‘Learn’ button on your opener to enter programming mode, and then promptly press the desired button on the new remote. Just like before, your opener should respond, indicating a successful pairing.
In the case of a lost or stolen remote, or if your remote is acting erratically, resetting the opener can be a secure solution. This process generally involves holding down the ‘Learn’ button until the LED light goes out, effectively erasing all previous programming. After this, you can reprogram your existing remotes following the steps we’ve outlined.
Being prepared for these situations not only adds an extra layer of security but also ensures you can extend the convenience of remote operation to every member of your household. Whether you’re resetting or adding more remotes, you’re now equipped with the knowledge to handle it!
The Final Word
Having successfully navigated the journey of How to program garage door opener, you’ve now acquired a skill that blends convenience, efficiency, and security into your daily life. As we’ve witnessed, while appearing complex initially, the process is manageable when broken down into clear, concise steps.
Regardless of whether you’ve programmed one remote or a handful, the key takeaway is understanding the process and its fundamental principles. This understanding empowers you to tackle similar tasks in the future with ease and confidence. Plus, knowing how to reset the system adds an essential layer of security, ensuring you’re prepared for any eventuality.
Remember, while this guide provides a general procedure, it’s always wise to refer to your product’s manual for specific instructions, as the steps can vary slightly between different models and brands.
So, here’s to your success in making your daily routine more efficient. Congratulations on mastering the art of programming your garage door opener! Enjoy the newfound convenience and peace of mind that comes with it.