Skip to content
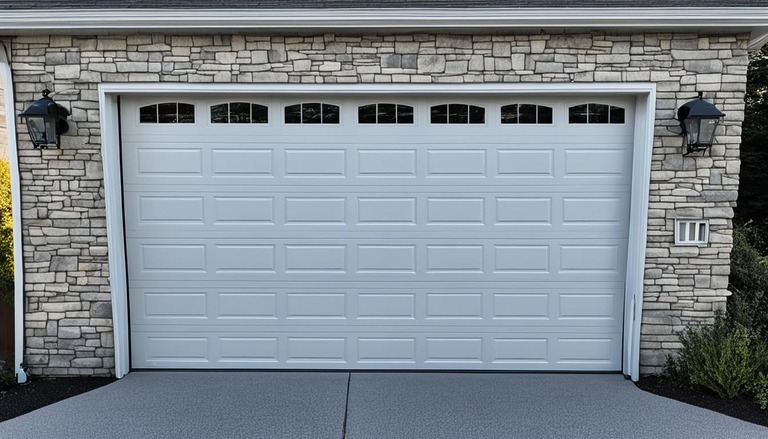
A malfunctioning garage door can be a headache for homeowners, especially when it fails to close properly. Whether your garage door won’t shut, won’t stay down, or stops before closing, the issue can be frustrating to deal with.
The good news is that you can try several simple fixes before resorting to professional help. In this article, we’ll explore the most common causes behind a garage door not closing all the way and offer practical troubleshooting tips to get your garage door back in working order.
Key Takeaways
- garage door won’t close can be caused by various issues such as malfunctioning sensors, worn-out rollers, or limit switch problems.
- Before seeking professional help, homeowners can try simple fixes such as checking batteries, lubricating components, or removing obstructions from the tracks.
- Regular preventive maintenance is essential to avoid garage door issues, including not closing properly, in the future.
Troubleshooting Garage Door Not Closing Issues
Garage doors not closing can be frustrating for homeowners. However, before seeking professional repair services, you can take several DIY steps to fix the problem. Here, we outline a step-by-step troubleshooting process to identify potential causes of garage doors not closing and offer practical solutions to resolve them.
Step 1: Check the garage door tracks
The garage door tracks should be free of any debris or obstructions. Use a cloth to wipe away any buildup, and ensure the tracks are properly aligned. Misaligned tracks can prevent the door from closing correctly. Also, examine the tracks for any damage that may require repair or replacement.
Step 2: Inspect the garage door springs
Garage door springs are essential to the door’s lifting mechanism, so it’s crucial to ensure they’re in good condition. If the springs are worn out, they can cause the door to become unbalanced, leading to various issues, including failure to close. Look for any signs of wear and tear, such as cracks, rust, or brittleness. Replace the springs if needed, or call in a professional for repair or replacement.
Step 3: Check the garage door opener limit switch
The garage door opener limit switch controls the door’s movement and prevents it from opening or closing too far. A misaligned or faulty switch can cause the door to stop prematurely or fail to close. Adjust the switch position if needed, and ensure it’s operating correctly. Refer to the manufacturer’s guidelines for specific instructions. If the switch is faulty and needs replacement, contact a professional.
Step 4: Test the garage door sensor
The garage door sensor is a safety feature that stops the door from closing if there are any obstacles in its path. If this sensor isn’t functioning correctly, the door may not close correctly or stop prematurely. Check the sensor before waving a long object, such as a broom. If the door doesn’t respond by reversing its movement, the sensor may be faulty and need replacing. Contact a professional for assistance.
Step 5: Lubricate the garage door components
Garage doors are constantly exposed to harsh elements that can lead to rust, wear, and tear. Regular lubrication of the moving parts, including the hinges, rollers, and springs, can help prolong the door’s life and prevent issues such as sticking or failure to close. Apply a silicone-based lubricant to all moving parts to ensure smooth operation.
Using the above troubleshooting steps, you can resolve many of the issues that cause garage doors to not close correctly. However, if DIY attempts fail to fix the problem, it may be time to call in a professional for diagnosis and repair.
Check the Garage Door Opener Remote Batteries
If your garage door isn’t closing, the issue could be as simple as weak or dead garage door opener remote batteries. It’s essential to check the batteries before proceeding with other troubleshooting methods.
To check the batteries, remove the garage door opener remote cover and inspect the batteries. If they look corroded or damaged, replace them with new ones. If unsure about which batteries to use, refer to the manufacturer’s instructions.
Avoid using rechargeable batteries as they tend to have lower voltage levels, which can affect the garage door’s operation. It’s also important to test the remote after replacing the batteries to ensure it’s functioning correctly.
Inspect the Garage Door Tracks for Obstructions
One of the most common reasons why a garage door may not close properly is obstructions in the tracks. These can include debris, dirt, or other objects that may accumulate over time, preventing the door from closing smoothly. It is essential to inspect the tracks regularly to ensure that they are clear and free of any obstacles, which can help prevent future issues.
To inspect the garage door tracks, begin by visually examining them for any visible debris or objects. If you notice any, use a small broom or brush to remove the dirt or debris, or gently remove larger objects by hand. Ensure no remaining traces of debris or objects are on the tracks. Next, check the alignment of the tracks if the door is still not closing. Misaligned tracks can also cause obstructions, and it’s essential to ensure they are straight and even.
If you encounter stubborn obstructions, it may be necessary to lubricate the tracks after clearing the tracks of debris and dirt. Use a lubricant such as WD-40 or any other high-quality silicone spray, and ensure to clean off any excess lubricant that may attract dirt or debris or cause the tracks to become slippery.
Regular inspections and clearing of the garage door tracks of obstructions can improve the door’s performance, ensuring it remains in good working condition. In case of any damage to the tracks, consult a professional garage door repair service to provide an adequate solution.
Lubricate the Garage Door Components
Regular lubrication of garage door components is essential for proper door function and can prevent issues such as the door not closing. The hinges, rollers, and springs can wear down without proper lubrication, causing unnecessary friction and impeding movement.
To lubricate the components, begin by wiping them clean with a rag. Then, apply a silicone-based lubricant to the hinges, rollers, and springs, ensuring to coat them thoroughly. Avoid using grease or oil-based lubricants as they can attract dirt and debris, further contributing to friction and damage.
Lubricating the components at least twice a year or as needed is recommended, depending on use and climate conditions. Regular maintenance can prolong the door’s lifespan and save homeowners costly repairs in the long run.

Benefits of Lubricating Garage Door Components
Proper lubrication of garage door components can bring many benefits:
- Smoothing operation: Lubricated components can move more smoothly, reducing the strain on other door parts and promoting efficient operation.
- Reducing noise: Properly lubricated components can run quietly, avoiding unnecessary noise that could disturb neighbors and household members.
- Enhancing longevity: Regular lubrication protects the door’s components from unnecessary wear and tear, promoting long-term durability and effectiveness.
- Cutting costs: With minimal investment in lubricant and time, homeowners can prevent costly repairs or replacements of the garage door and its components in the future.
Adjust the Garage Door Opener Limit Switches
When you experience your garage door stuck open all the way or stopping before it closes, it might mean that the limit switches of your garage door opener need adjustments. Limit switches are crucial in accurately controlling the door’s position by signaling to the opener when it is fully open or closed. Instructions on adjusting these switches can vary depending on your specific garage door opener model, so it is essential to refer to the manual for accurate guidance.
Before making any adjustments, inspect the switches for any damage or deformation. If any components appear damaged, contact a professional to repair or replace them before adjusting.
To adjust the limit switches, locate the two black knobs on the side of the opener unit near the motor. These knobs control the position of the switches and can be turned with a screwdriver to adjust the switch’s position either up or down.
Start by adjusting the switch responsible for controlling the door’s full opening. Turn the knob with a screwdriver in small increments and test if the door closes correctly before making any further adjustments. Repeat the process for the switch responsible for controlling the door’s full closing, adjusting and testing the door’s movements until it shuts correctly.
Adjust the switches until they are both in the right positions for the door to open and close correctly. It is essential to note that over-adjusting the switches can cause the door to close too forcefully, creating a potential safety hazard if something or someone is obstructing the door’s path.
Check the Garage Door Safety Sensors
Safety sensors are vital for ensuring the safe operation of your garage door. They send signals to the garage door opener that detects any objects or obstructions in the door’s path. If the sensors detect an obstruction, it will signal the opener to stop the door from closing, preventing accidents and damage to your property.
However, garage door safety sensors can malfunction for various reasons, causing the door not to close properly. The most common causes include misalignment of the sensors, dirt or debris on the sensors, broken or damaged wiring, or worn-out sensors.
If you’re experiencing troubles with garage door closing, there are several troubleshooting tips you can do to check and fix safety sensor issues:
- Inspect the sensors: Check if the sensors are aligned correctly. They should face each other and be no more than six inches above the ground.
- Clean the sensors: Remove any dirt, dust, or debris that may be blocking the sensors. Use a clean cloth or paper towel to wipe the sensors.
- Check the wiring: Ensure that the wiring connections are secure and that there are no broken or damaged wires.
- Replace the sensors: If the sensors are worn out or damaged, replace them with compatible ones.
Checking and fixing safety sensor issues can resolve garage door won’t stay down problems quickly. If you are unsure or uncomfortable doing the troubleshooting and fixing on your own, seek professional garage door repair services for assistance.
Inspect and Adjust the Garage Door Springs
One of the most critical components of a garage door is the springs, which are responsible for supporting and balancing the door’s weight. If the springs are worn out or damaged, it can lead to issues with the door’s operation, including difficulty in closing. Therefore, inspecting and adjusting the garage door springs regularly is crucial to ensure they are properly balanced.
To inspect the springs, disengage the opener and manually lift the door to its halfway point. If the door stays in place, the springs are balanced. However, if one of the sides drops, the springs need to be adjusted or replaced. It is recommended to seek professional help to replace garage door springs, which can be extremely dangerous to handle without proper training and equipment.
If the springs need to be adjusted, turn the tension rods attached to them clockwise to tighten them. Turn them counterclockwise to loosen the springs. Adjust them gradually and equally on both sides until the door is balanced and closes properly.
Note: It is essential to use caution when handling garage door springs, as they are under high tension and can cause serious injury or damage if mishandled. Always refer to the manufacturer’s instructions or seek professional help when in doubt.
Check the Garage Door Opener Force Settings
One of the reasons why a garage door may not close is due to incorrect garage door opener force settings. The opener force settings regulate the amount of force the garage door opener exerts to close the door. If the settings are too high, it can cause the door to reverse, and if they are too low, it may prevent the door from closing all the way.
To check the garage door opener force settings:
- Locate the force adjustment screws on the opener unit. These are usually located on the back of the unit and are marked “upforce” or “downforce.”
- Place a piece of wood, such as a 2×4, flat on the ground underneath the garage door.
- Activate the door opener to close the door.
- If the door reverses after touching wood or fails to close all the way, adjust the downforce setting by turning the screw counterclockwise. Repeat until the door closes firmly without reversing.
- If the door closes too quickly or slams shut, adjust the up force setting by turning the screw counterclockwise. Repeat until the door closes firmly without slamming shut.
Adjusting the garage door opener force settings within the manufacturer’s recommended range is essential. Too much force can damage the door, while too little force can lead to ineffective door operation. Refer to the door opener manual for specific information on recommended settings for your particular brand and model.

Replace Worn-out Garage Door Rollers
If your garage door is not closing properly, the issue could be worn-out rollers. Over time, the rollers can become rusty or damaged, making it difficult for the door to move along the tracks. This section will guide you through the process of inspecting and replacing your garage door rollers for improved door functionality.
How to Inspect the Garage Door Rollers
Inspecting your garage door rollers is a simple process that can help identify any damage or wear and tear. Here are the steps you need to follow:
- Start by pulling the emergency release cord and disconnecting the opener.
- Manually lift your garage door to open it fully.
- Check the condition of each roller, looking for signs of wear and tear, cracks, or damage.
- Ensure the rollers are secured in the tracks and move smoothly along them.
If you notice any of the above issues, it’s time to replace your garage door rollers.
How to Replace Worn-out Garage Door Rollers
Replacing garage door rollers isn’t difficult, but it requires the right tools and safety precautions to ensure you don’t injure or damage the door. Here are the steps you need to follow:
- Start by pulling the emergency release cord and disconnecting the opener.
- Manually lift your garage door to open it fully.
- Secure the door with clamps to prevent it from closing when you remove the old rollers.
- Remove the old roller from its bracket and replace it with a new one.
- Repeat this process for each roller, ensuring they are all properly aligned and secured in the tracks.
- Release the clamps and test the garage door to ensure it’s moving smoothly along the tracks.
Replacing your garage door rollers can significantly improve the functionality of your garage door, making it easier and safer to operate.
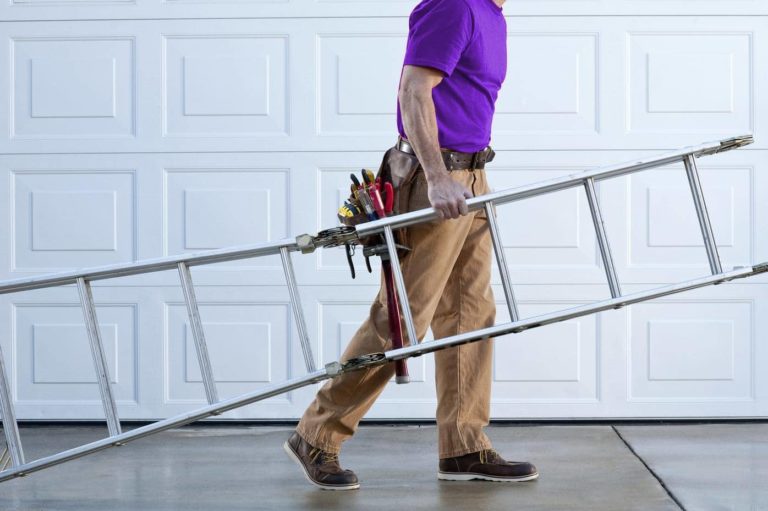
Seek Professional Garage Door Repair Services
While attempting to fix a garage door that won’t close is a reasonable course of action, some issues may require the touch of a professional. A seasoned garage door repair service has the expertise to diagnose and solve complex problems that a homeowner may not be equipped to handle.
When considering professional garage door repair services, choosing a reputable and experienced provider is crucial to ensure quality workmanship. A reliable repair service can promptly identify the problem areas and use their skills and tools to repair or replace them, ensuring your garage door’s safe and smooth operation.
Additionally, professional services can offer maintenance tips to reduce the likelihood of future issues, helping homeowners save time, money, and stress in the long run.
“Attempting a DIY fix for a complex garage door issue can exacerbate the problem and lead to further frustration. When in doubt, call an experienced garage door repair professional for safety and efficiency.”
Preventative Garage Door Maintenance Tips
Regular preventative maintenance is crucial to ensure garage doors continue to function optimally and prevent issues from arising. Here are some practical garage door maintenance tips homeowners can implement:
| Maintenance Tips | Description |
|---|---|
| Inspect and Clean the Door | Inspect the garage door for signs of wear and damage, such as fraying cables or cracked panels. Clean the door and its components regularly to prevent dirt and debris buildup. |
| Lubricate Moving Parts | Lubricate all moving parts of the garage door, including hinges, rollers, and springs, with a recommended lubricant to ensure smooth operation. |
| Test the Door’s Balance | Periodically test the door’s balance by disconnecting the opener and manually operating the door. The balance needs adjustment if it doesn’t stay in place when opened halfway or feels heavy. |
| Check and Replace Weatherstripping | Check the weatherstripping on the garage door regularly to ensure a tight seal and replace it if damaged or weathered to prevent air or moisture infiltration. |
| Keep Opener and Remote Batteries Fresh | Replace the garage door opener and remote batteries regularly to ensure efficient operation and avoid issues with opening or closing the door. |
Incorporating these preventative garage door maintenance tips can increase a homeowner’s garage door’s lifespan, prevent costly repairs, and ensure optimal door operation.
Common Causes of Garage Door Not Closing
Several factors can contribute to a garage door not closing properly. Identifying the underlying causes is the first step in troubleshooting the issue. Here are some of the common causes:
| Cause | Description |
|---|---|
| Photo Eye Issues | Photo eyes are sensors located at the bottom of the garage door. They can prevent the door from closing if they are misaligned or dirty. |
| Broken Springs | Garage door springs are essential components responsible for lifting and lowering a garage door. Broken springs can lead to the door becoming stuck in an open position. |
| Track Obstructions | Obstacles such as debris or objects blocking the garage door’s tracks can impede its movement and cause it not to close. |
| Worn-out Rollers | Broken or worn-out rollers can cause the garage door to get stuck or move unevenly. This can also lead to an issue with the door not closing. |
| Opener Malfunctions | If the garage door opener is faulty or malfunctioning, it can prevent the door from closing. Issues such as faulty wiring, damaged gears, or a faulty limit switch can be the root cause. |
In most cases, addressing these common causes can resolve the issue of a garage door won’t go down properly. However, if the problem persists, professional garage door repair services may be necessary.
Conclusion
Addressing a garage door that won’t close issue promptly is crucial to ensure optimal functionality and safety. By following the troubleshooting tips and maintenance techniques discussed in this article, homeowners can resolve the problem swiftly and efficiently. Regular preventative maintenance can also help minimize the occurrence of such issues in the future.
If all DIY attempts fail to fix the problem, seeking the assistance of professional garage door repair services is recommended. Experienced repair technicians can diagnose and resolve complex issues to ensure the garage door functions smoothly and securely.
Remember, with the right approach, a garage door not shutting can be an issue of the past. Take proactive measures to maintain your garage door and enjoy its optimal performance for years to come.