Skip to content
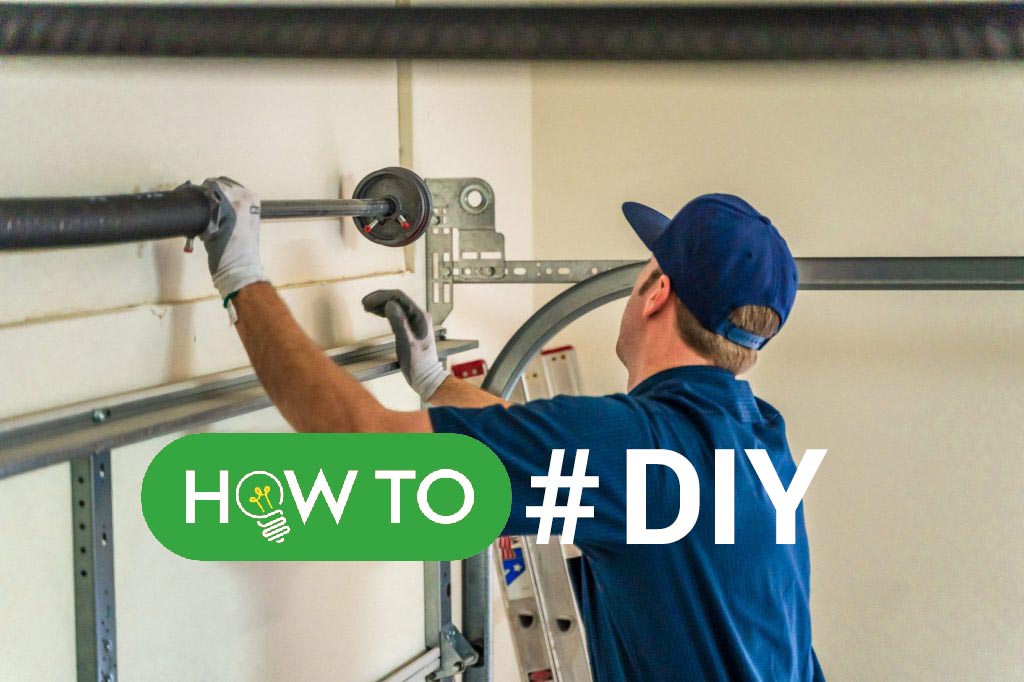
Table of Contents
A garage door spring plays a crucial role in the operation of your garage door. It’s responsible for supporting the weight of the door and making it easy to open and close. However, like any mechanical part, it can wear out over time and eventually fail. When this happens, it’s important to know how to fix it to prevent further damage to your garage door.
In this article, we’ll provide you with a step-by-step guide on how to fix a garage door spring. We’ll cover everything you need to know to repair or replace a broken spring, including tools and materials needed, safety precautions to take, and tips for troubleshooting common issues.
Step 1: Assess the Situation
Step 1 involves inspecting the garage door spring and cables for damage or adjustment needs. Determine if the spring is torsion or extension, as this affects repair process and tools needed. Identifying the type of spring is critical for successful repair. Careful inspection of the spring and its connected parts is crucial in assessing the situation. Checking for cracks, gaps, and wear and tear helps determine if the spring is broken. Knowing the type of spring will guide the repair process and prevent further damage to the garage door. In summary, inspecting and identifying the spring’s condition is a vital first step in fixing a garage door spring.
Step 2: Gather Your Tools and Materials
Step 2 involves gathering tools and materials needed for repair. These include wrenches, pliers, a hammer, safety glasses, gloves, replacement springs, and cables. Having the right tools and materials on hand is essential for a successful repair. Safety glasses and gloves protect against potential injury. Replacement parts may include springs, cables, and brackets, so it’s important to note the type of spring in Step 1. A winding bar is also needed for torsion springs. By gathering the necessary tools and materials beforehand, you’ll be prepared to tackle the repair job safely and effectively.
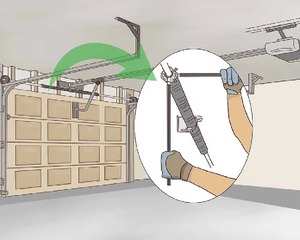
Step 3: Release the Tension on the Spring
Step 3 involves releasing tension on the garage door spring. This can be dangerous and requires a winding bar. Keep your body and face away from the spring to avoid injury. Turning the winding bar slowly and steadily will unwind the spring. It’s important to release all tension to safely remove the spring. Releasing tension requires experience, so it’s best to consult a professional. Safety precautions, including safety glasses and gloves, are necessary when releasing tension. Careful attention to safety is critical in Step 3 to avoid injury while repairing the garage door spring.
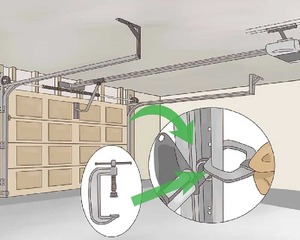
Step 4: Remove the Broken Spring
Step 4 involves removing the broken spring and its brackets from the garage door. Take note of how the spring was attached to the door and track. Use caution when removing the spring to avoid injury. If the spring is stuck, tapping it lightly with a hammer can loosen it. It’s important to keep track of all the parts and hardware you remove to ensure they’re put back correctly later. This step may require two people to safely remove the spring. By removing the broken spring and brackets carefully, you’ll be one step closer to repairing the garage door spring.
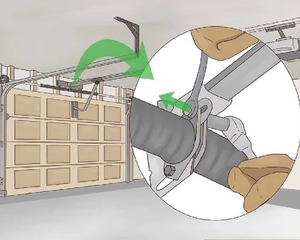
Step 5: Install the New Spring
Step 5 involves installing the new spring by attaching it to the brackets and track. Wind the spring with the winding bar, keeping your body and face out of the way in case the spring snaps. Ensure the spring is properly attached and secured to the door and track. Reconnect the cables and any other parts that were removed. Use caution when winding the spring to avoid injury. Double-check that the spring is correctly installed and the door is properly balanced. By installing the new spring properly, you’ll ensure that your garage door operates safely and effectively.
Step 6: Check the Door’s Balance
Step 6 involves checking the door’s balance after installing the new spring. Open and close the door several times to test the spring’s tension and make any necessary adjustments. A properly balanced door should stay in place when open or closed. If the door is heavy or difficult to move, it’s a sign that the spring tension needs adjusting. Make small adjustments to the spring tension until the door is balanced. Ensure that the door is properly aligned with the track and the cables are secure. By checking the door’s balance, you’ll ensure that your garage door operates safely and effectively.
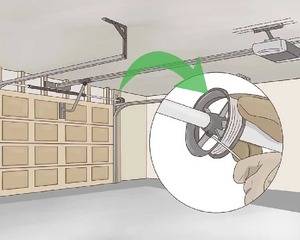
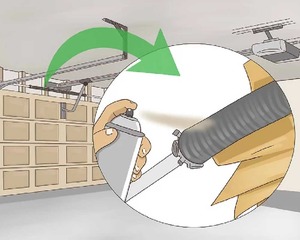
Step 7: Lubricate Moving Parts
Step 7 involves lubricating all moving parts, including the springs, hinges, and rollers. Apply a silicone-based lubricant to all moving parts to prevent wear and tear. This improves the performance of your garage door and extends its lifespan. Lubricating the door every six months is recommended for optimal performance. Use a clean cloth to wipe away any excess lubricant. Avoid using WD-40 or other petroleum-based lubricants as they can attract dust and debris. By lubricating your garage door regularly, you’ll reduce the risk of future repairs and ensure that your garage door operates smoothly and quietly.
Step 8: Troubleshoot Common Issues
Step 8 involves troubleshooting common issues that may affect the operation of your garage door. Common issues include misaligned tracks, damaged cables, or worn out rollers. If the door is noisy or difficult to open, these issues may be the cause. Troubleshoot the problem by examining the door’s track and cables for any signs of damage. Adjust the track or replace damaged cables or rollers as needed. Test the door’s balance again after making any adjustments. If the problem persists, consult a professional for help. By troubleshooting common issues, you’ll ensure that your garage door operates safely and smoothly.
Safety Precautions
Working with garage door springs can be dangerous, so it’s important to take safety precautions. Wear safety glasses and gloves to protect your eyes and hands. Release tension on the spring slowly and steadily to avoid injury. Keep your body and face away from the spring at all times. Use a winding bar to release tension on torsion springs. Avoid using makeshift tools, as they can be dangerous. If you’re unsure about any aspect of the repair process, consult a professional. Never attempt to repair a broken spring yourself unless you have experience. By taking safety precautions, you’ll avoid injury and ensure a successful repair.
Conclusion
In conclusion, fixing a garage door spring can be a challenging task, but with proper safety precautions and knowledge, it can be done effectively. It is important to assess the situation carefully, gather the necessary tools and materials, and release tension slowly and steadily to avoid injury. Installing and adjusting the new spring properly, lubricating all moving parts, and troubleshooting common issues can ensure that your garage door operates safely and smoothly.
Taking safety precautions such as wearing safety glasses and gloves, avoiding makeshift tools, and seeking professional help when needed can prevent injury and ensure a successful repair. Regular maintenance and inspection can also prevent future repairs and keep your garage door in good working condition.
By following the steps outlined in this guide and prioritizing safety, you can successfully fix your garage door spring and save money on professional repairs.