Skip to content
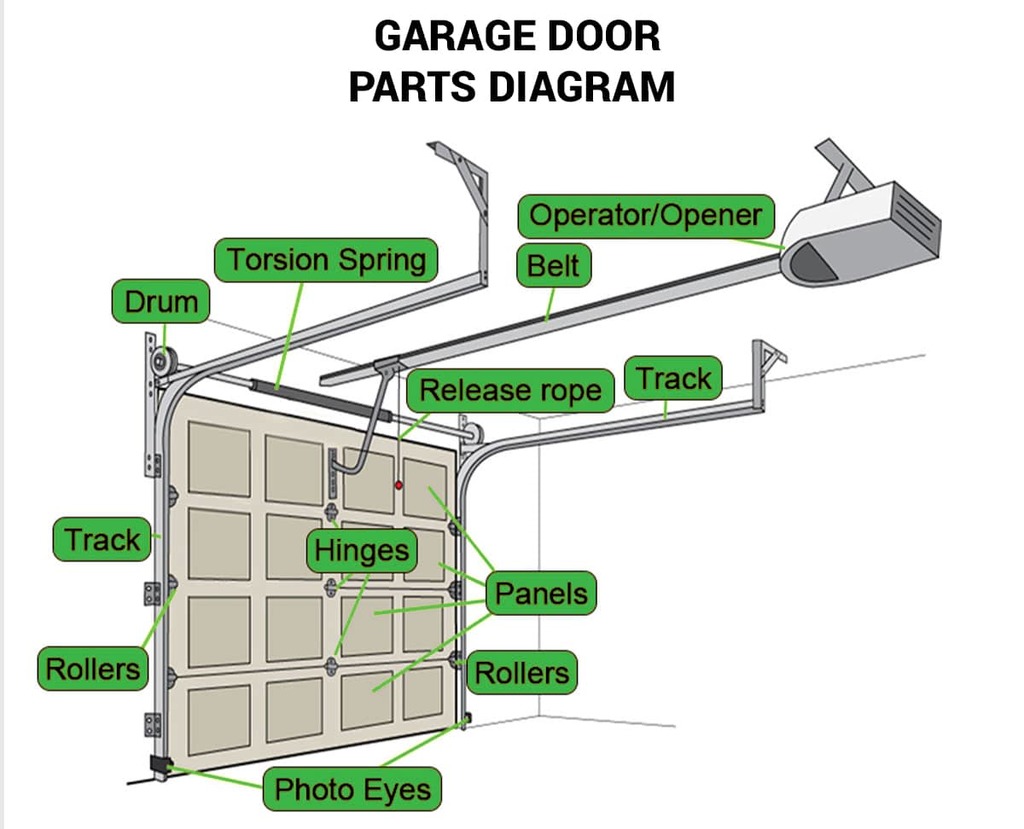
Introduction
Let’s be real: Garage doors have opinions. They groan when cold, screech when ignored, and pick the worst times to rebel—like when you’re hauling groceries or herding kids. But here’s the kicker: Most of us couldn’t name a single part beyond “the loud spring thingy.” That changes today. This garage door parts diagram is your decoder ring. You’ll meet the torsion spring (the Hulk of your door), the rollers (ninja-quiet when happy), and the photo eyes (your pet’s unsung heroes). Ever wondered what that red rope does besides look dramatic? Spoiler: It’s your lifeline when the power dies mid-Netflix binge.
I once spent hours Googling “why garage door sounds like a dying robot” before learning it was a $5 roller. Don’t be me. Bookmark this guide, laugh at terms like “drum” and “track,” and arm yourself for your next showdown with that stubborn door.
1. Operator/Opener: The Brain of the System
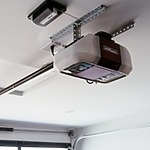
Your garage door opener isn’t just a button—it’s the tech-savvy maestro running the show. Think of it as your door’s smartphone: it connects remotes, keypads, and even Wi-Fi for app control.
- Chain-drive models? They’re the budget-friendly workhorses but sound like a coffee grinder.
- Belt-drive openers? Whisper-quiet, perfect for garages under bedrooms.
- Screw-drive? Low-maintenance but picky about temperature swings.
Got a door that ignores commands or reverses randomly? Blame signal interference (your neighbor’s new security cam might be the culprit) or worn gears.
2. Torsion Spring: The Muscle
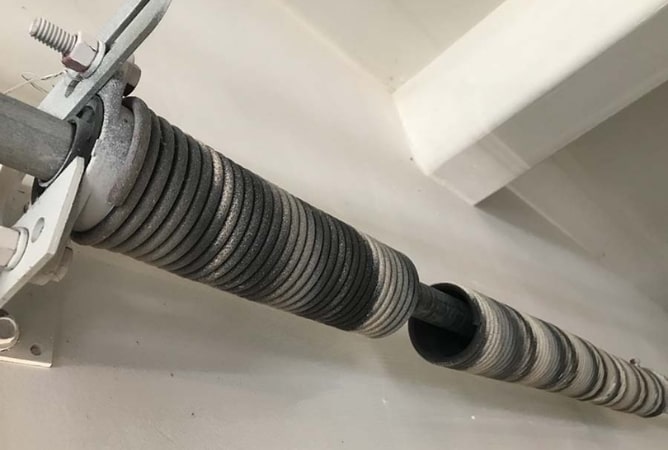
Torsion springs are the unsung heroes—or villains—of your garage door. Mounted on a steel shaft above the door, they twist tighter than a yoga instructor to counterbalance 80-90% of the door’s weight. Left-wound vs. right-wound isn’t just trivia: Wind them wrong, and they’ll unravel violently.
A snapped spring isn’t just loud—it’s dangerous. Imagine a door slamming shut faster than a grizzly bear.
Safety Note: If your spring breaks, don’t YouTube it. Call a pro. Those coils don’t care about your DIY pride.
3. Rollers: Silent Workhorses
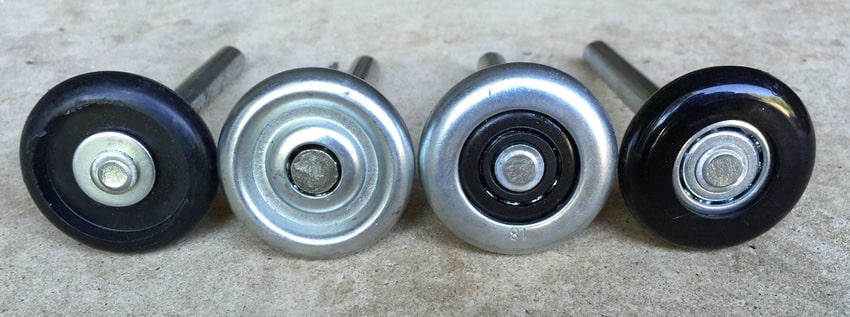
Rollers are the unsung ninjas of your garage door—sleek, quiet, and very moody when neglected. Nylon rollers glide like butter on hot toast, perfect for homes where “garage door noise” rivals a toddler’s tantrum. Steel rollers? Durable, but they’ll announce every move like a Broadway drumroll.
Worn rollers don’t just screech—they derail. Picture your door lurching sideways like a grocery cart with a broken wheel.
Classic signs: Grinding noises, jerky motion, or tracks littered with metal shavings.
DIY fix? Maybe. But if the roller’s seized, you’ll need vise grips, patience, and a vocabulary your kids shouldn’t hear.
4. Drum: The Cable’s Dance Partner
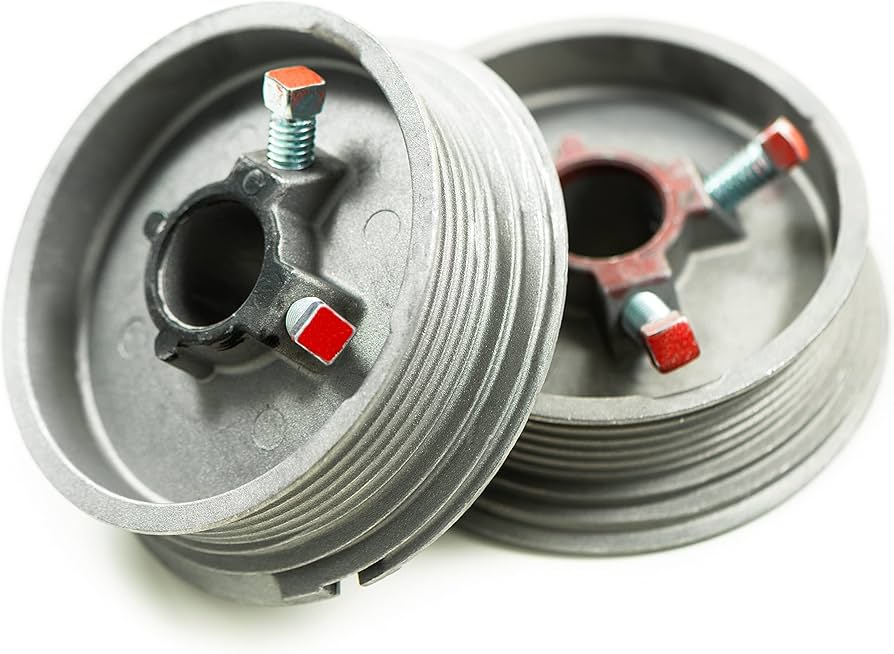
The 4th in garage door parts diagram is drum. The drum looks like a medieval torture device but has one job: spool cables neatly as the door moves. Attached to the torsion spring shaft, it’s the reason cables don’t spaghetti-tangle mid-cycle. But if the drum’s misaligned? Cables fray, the door tilts, and suddenly you’re hosting a garage door horror show.
Most folks ignore drums until they hear the ping-ping of loose cables.
5. Belt: The Opener’s Whisper
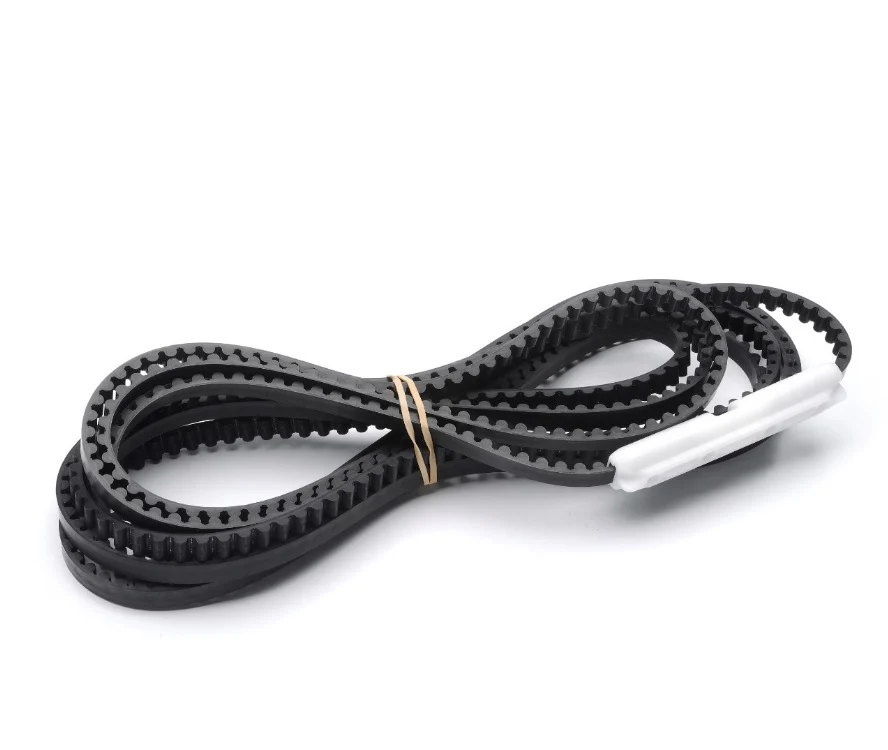
Belt-drive openers are the introverts of garage tech—quiet, efficient, and allergic to drama. The belt (rubber or steel-reinforced) transfers power from the motor to the door. Stretch it too far, and it’ll slip like a bad handshake. Snap it? Your door becomes a very expensive wall decoration.
Signs of trouble: A high-pitched “whine” during operation or the door stuttering like a nervous stand-up comic. Fix it fast: A loose belt strains the motor, and replacements cost less than a dinner date.
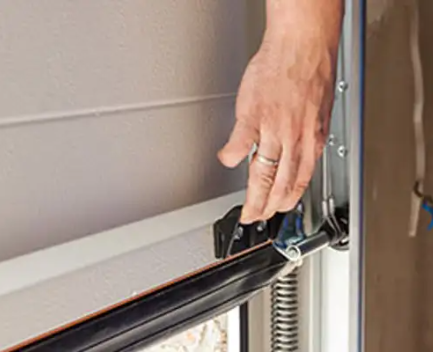
6. Release Rope: Emergency Override
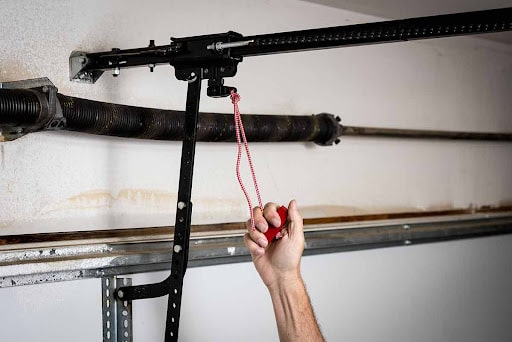
That bright red handle dangling from your opener isn’t just for decoration—it’s your garage door’s “panic button.” When the power dies mid-storm or your opener decides to ghost you, yanking the release rope disconnects the motor, letting you operate the door manually. But here’s the catch: Pull straight down, not sideways. Yanking diagonally bends the trolley mechanism, turning a quick fix into a $200 repair.
Moral? Always engage the release before manual operation.
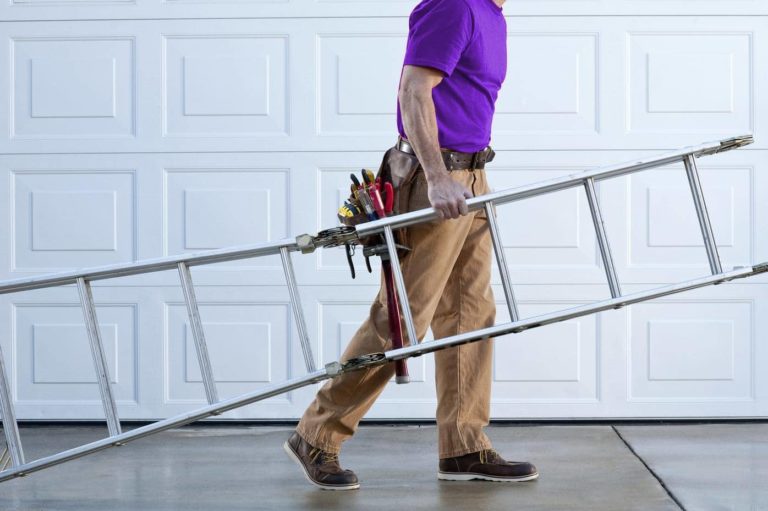
7. Track: The Door’s Highway
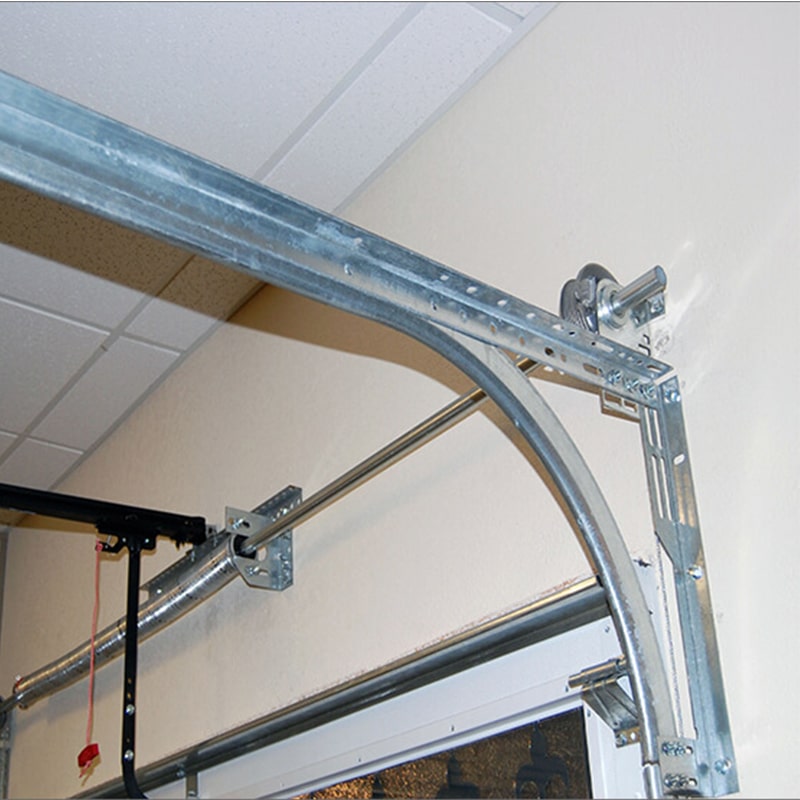
Garage door tracks are like the 405 freeway for your rollers—mess them up, and everything grinds to a halt. Made of heavy-gauge steel, they guide the door’s vertical climb and overhead curve. But hit them with a ladder (we’ve all done it), and they’ll dent faster than a soda can.
Bent tracks don’t just jam the door—they shred rollers, strain springs, and create a metallic screech that’ll haunt your dreams. Minor dents? Tap them out gently with a rubber mallet. But if the track looks like a rollercoaster designed by a toddler, stop. DIY straightening often worsens alignment.
8. Hinges: Flexible Joints
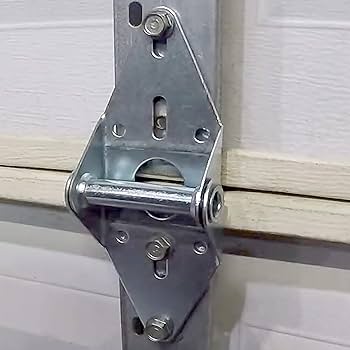
Hinges are the unsung acrobats of your garage door—bending backward as the door opens, then snapping straight as it closes. Standard doors have 10-15 hinges, and just one rusted hinge can sound like a fork in a garbage disposal.
There are two types:
- Stationary hinges: Fixed to panels, they handle basic movement.
- Rolling hinges: Have built-in rollers for doors with horizontal tracks.
Rust is their nemesis. Coastal humidity? It turns hinges into flaky croissants. Lubricate them every 3 months with silicone spray (not grease—it attracts dirt). Cracked hinges? Replace them ASAP. Ignore one, and the panel above it will sag, strain adjacent hinges, and eventually peel away like a bad sunburn.
9. Panels: The Door’s Face
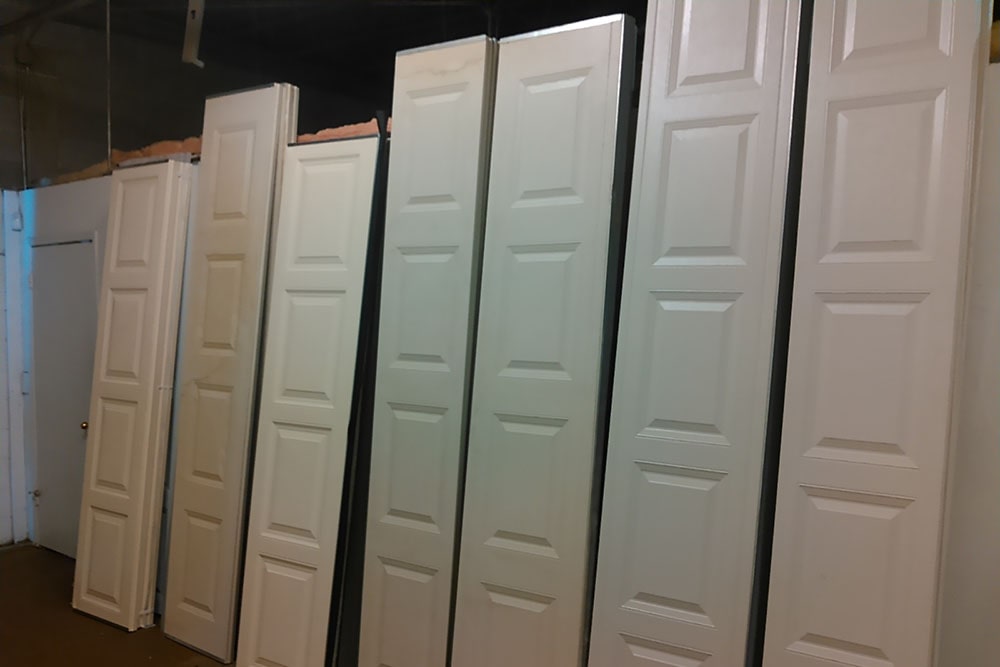
The next in garage door parts diagram – panels. Panels are your garage door’s skin—steel, aluminum, or wood sections that keep out weather, critters, and nosy neighbors. But they’re not invincible. A rogue baseball, hailstorm, or overenthusiastic Uber driver can dent, crack, or warp them.
- Steel panels: Durable but prone to dings. Use a rubber mallet and block of wood to gently pound out small dents.
- Aluminum: Lightweight but bends easily. Once warped, they rarely spring back.
- Wood: Beautiful but high-maintenance. Rot, termites, or peeling paint? Say hello to $$$.
Severe damage compromises insulation (hello, $300 energy bills) and security (burglars love flimsy panels). While filler kits work for minor dings, large cracks or multiple damaged panels mean full replacement.
Cautionary tale: A homeowner ignored a cracked panel for months. Winter rains seeped in, rusting the bottom hinge and track. Total repair cost? $1,800. Don’t be that guy.
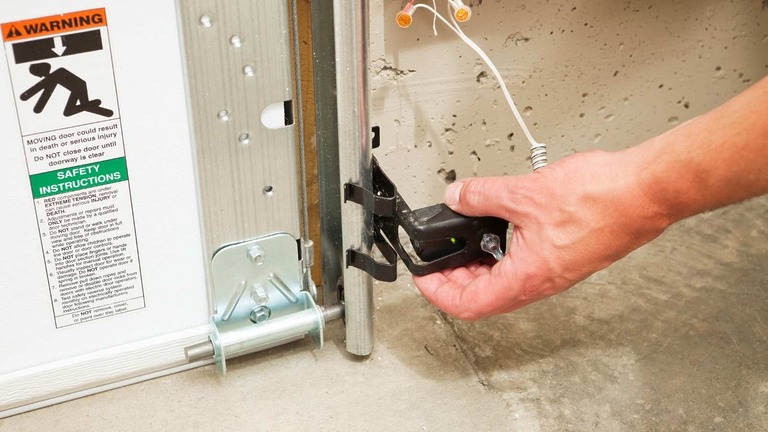
10. Photo Eyes: Safety Sentinels
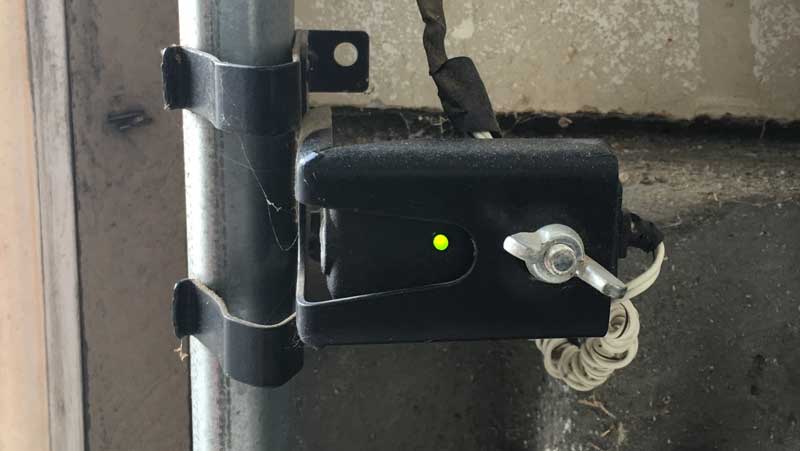
Photo eyes are your garage door’s conscience—always watching, never sleeping. These infrared sensors flank the door’s base, shooting an invisible beam between them. If anything (a kid, a bike, your cat’s tail) breaks the beam while closing, the door reverses instantly. But when they’re misaligned by even a millimeter? Your door becomes a drama queen, reversing randomly or refusing to close at all.
Classic fails:
- Dirty lenses: A speck of dust can trick the sensors into “seeing” a ghost. Wipe them monthly with a microfiber cloth.
- Sunlight interference: Direct sunlight can overpower the beam. Shield them with makeshift shades (yes, a post-it note works).
- Loose wiring: Critters love chewing sensor wires. Check for fraying if your door acts possessed.
Pro tip: Test monthly by closing the door and waving a broomstick through the beam. No reversal? Adjust the sensors until their indicator lights glow steady. And if your toddler thinks it’s a game of “dodge the door,” maybe skip the demo.
11. Weather Stripping: The Seal
Weather stripping is the unsung hero between you and a garage that smells like a wet dog. That rubber strip along the door’s bottom and sides? It’s battling rain, dust, and drafts 24/7. But over time, UV rays turn it brittle, cold cracks it like peanut brittle, and pests treat it like an all-you-can-eat buffet.
Signs it’s dying:
- Daylight peeking through: If you see gaps wider than a pencil, it’s time.
- Soggy boxes: Water pooling during storms? The seal’s toast.
- Ant highways: Bugs marching in? They’ve found your stripping’s weak spot.
Replacement is DIY-friendly: Peel off the old strip, clean the channel, and press in the new one. Opt for reinforced vinyl for coastal homes or silicone for extreme temps.
Pro hack: Add a threshold seal for extra flood protection—because LA’s “sunshine” sometimes forgets it’s not Seattle.
12. Bonus: Cables
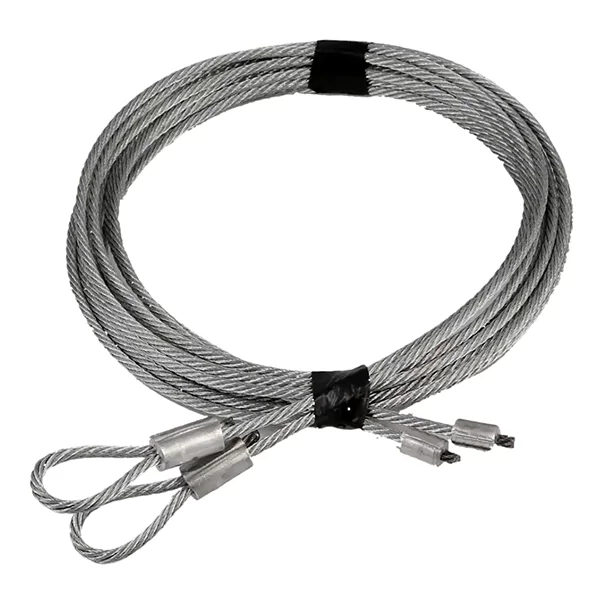
Cables are the tightrope walkers of your garage door—thin, strong, and very unforgiving. Steel cables connect the bottom brackets to the drums, working with springs to lift the door. But fray one under tension, and it’ll snap like a guitar string, whipping anything in its path.
Red flags:
- Rust streaks: Coastal air turns cables into Swiss cheese.
- Birdcaging: Frayed wires splaying out like a broken umbrella.
- Uneven lift: One side of the door lags—a sign a cable’s about to bail.
War story: A DIYer in Houston tried replacing cables without releasing spring tension. The drum spun wildly, the cable lashed his ladder, and he ended up stranded on the roof until fire crews arrived. Moral? Never touch cables without a pro’s help. They’re not “optional” parts—they’re lifelines.
Conclusion
After this deep dive into your garage door’s guts, you’re basically a door whisperer. You now know why weather stripping deserves a medal, how photo eyes save toes, and why torsion springs demand respect (and a pro’s phone number).
DIY? Go nuts on rollers, lubricating hinges, or swapping weather seals. But springs, cables, and tracks? That’s like performing surgery with a butter knife. Bookmark this garage door parts diagram, stick it on your fridge, and next time your door growls, you’ll know whether to grab a wrench or your phone.
Remember: A quiet door is a happy door. A safe door? Priceless. Now go forth—armed with knowledge and a healthy fear of torsion springs.