Skip to content

Introduction
Ever heard a loud SNAP followed by your garage door crashing shut? That’s the sound of a garage door spring waving the white flag. These coiled workhorses lift hundreds of pounds daily—until they don’t. Learning how to replace a garage door spring isn’t just about fixing a door; it’s about dodging a safety hazard that could leave you stranded… or with a dented car.
Here’s the thing: Garage door springs are like grumpy gym rats. They’re under insane tension, and if you poke them wrong, they’ll snap back hard. But with the right tools, patience, and respect for their power, you can tackle this job safely. I’ve walked dozens of homeowners through it—no ER trips required.
Let’s be clear: This isn’t changing a lightbulb. But if you’ve got a steady hand and a stubborn streak, I’ll show you how to do it without becoming a cautionary tale.
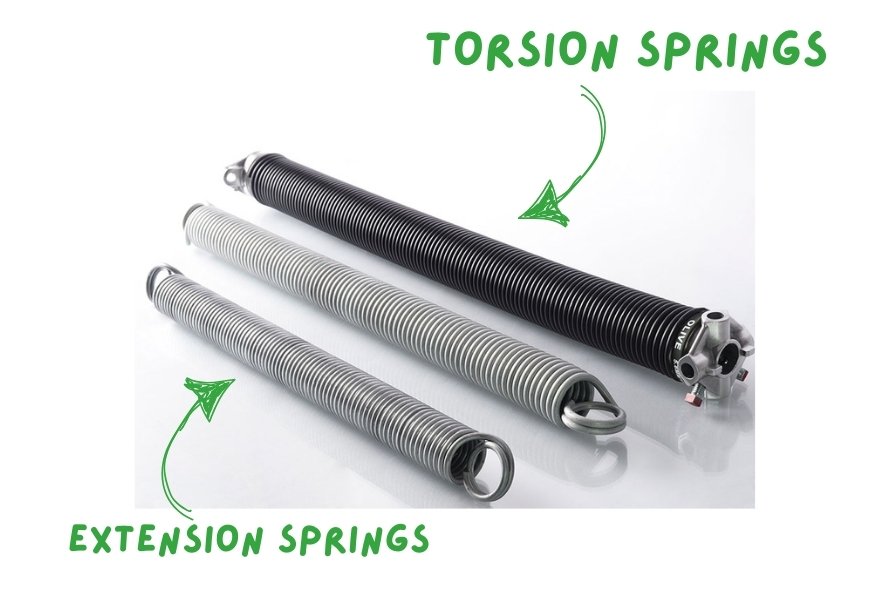
Types of Garage Door Springs
Let’s get one thing straight: Not all garage door springs are created equal. The wrong approach to replacing them is like using a butter knife to chop firewood—it’ll end badly. Here’s the lowdown on the two main types:
1. Torsion Springs
- Where They Live: Mounted horizontally on a metal shaft above your closed garage door.
- What They Do: These beefy coils twist (hence “torsion”) to lift the door’s weight. Think of them as a tightly wound jack-in-the-box—packed with energy.
- Common Issues: Over time, the metal fatigues. You’ll hear a loud bang when they snap, and suddenly your door weighs as much as a pickup truck.
- Reality Check: How to replace torsion spring on garage door jobs require winding bars and a death grip on caution. One wrong move, and that spring becomes a projectile.
2. Extension Springs
- Where They Live: Pair of springs along the sides of the door, stretching like taffy when the door closes.
- What They Do: They extend and contract to counterbalance the door’s weight—sort of like bungee cords for your garage.
- Common Issues: They can snap mid-stretch, sending metal shards flying. Worse, old ones often lack safety cables, turning them into DIY shrapnel.
- Reality Check: How to replace tension spring on garage door work is slightly less terrifying than torsion springs… but only slightly.
Quick Test to ID Your Spring Type:
- Look above the door for a metal rod with coils = Torsion.
- See springs running parallel to the tracks = Extension.
Still unsure? Snap a pic and text it to a pro. Better safe than sorry—trust me, I’ve glued enough drywall to know.
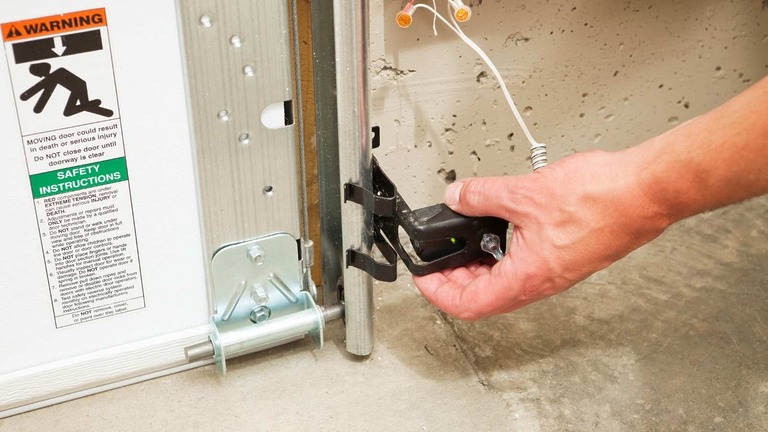
Safety First: Why This Isn’t a Typical DIY Job
Garage door springs aren’t just “under tension”—they’re basically coiled grenades. One wrong move, and you’re not just risking a repair bill. You’re risking a trip to the ER. Here’s why how to install garage door springs and cables demands more respect than your average DIY project:
- The Snap Factor: A broken torsion spring releases enough force to launch a wrench across your garage. Or your face.
- Cable Chaos: If a frayed cable snaps during replacement, the loose spring can whip around like a machete. I’ve seen it slice through PVC pipes like they’re butter.
- Door Dropping Danger: Mess up the tension, and your 200-pound door becomes a free-falling anvil. Say goodbye to whatever’s underneath.
Non-Negotiable Safety Gear:
- Safety Glasses: Not the dollar-store kind—get ones with side shields.
- Gloves: Leather, not fabric. Think “zombie apocalypse” protection.
- Steel-Toe Boots: Because gravity loves dropping heavy things on toes.
Still tempted to wing it? Ask yourself: Is saving $150 worth a broken hand?
Tools You’ll Need
You wouldn’t perform surgery with a butter knife. Don’t tackle springs without these:
- 1. Winding Bars (Torsion Springs ONLY):
Two 18-inch steel rods—never use screwdrivers. They’ll slip, and you’ll lose teeth. - 2. Vise Grips:
Lock these onto the torsion tube so the spring doesn’t unwind like a slinky from hell. - 3. Socket Set:
For removing bolts. Skip the adjustable wrench—it’ll round the edges and make you curse like a sailor. - 4. Safety Cables (Extension Springs ONLY):
Steel ropes that keep snapped springs from becoming missiles. If your springs don’t have these, add them now.
DIY Substitutes (At Your Own Risk):
- Steel Rods: Only if they’re exactly the same diameter as winding bars. A bent rod = a trip to urgent care.
- C-Clamps: Temporarily secure the torsion tube, but double-check they’re rated for heavy tension.
Step-by-Step Guide to Replacing Torsion Springs
Replacing a torsion spring isn’t a race—it’s a slow dance with physics. Rush it, and you’ll end up in a world of hurt. Here’s how to change a garage door torsion spring without becoming a viral fail video:
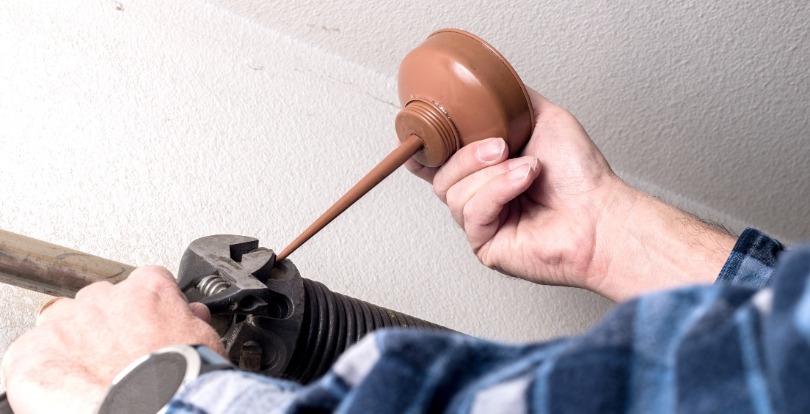
- Step 1: Release the Tension (No Shortcuts!)
- Insert winding bars into the winding cone holes. Hold them like your life depends on it—because it kinda does.
- Slowly turn the bars away from the spring to unwind it. If you hear creaking or feel resistance, stop. Breathe. Then keep going.
- Step 2: Remove the Old Spring & Cable
- Loosen the set screws on the winding cone and slide the old spring off the shaft.
- Unhook the cable from the bottom bracket. If it’s frayed or rusty, toss it—how to install a new garage door spring includes fresh cables.
- Step 3: Wind the New Spring
- Slide the new spring onto the shaft, matching the direction of the old one (left-wound vs. right-wound).
- Wind it gradually: For a 7-foot door, that’s about 30 quarter-turns. Use a marker to tally each rotation.
- Step 4: Reattach Cables & Test
- Loop the new cable around the drum and secure it to the bottom bracket.
- Test the door’s balance: Lift it halfway. If it stays put, you’ve nailed the tension. If it drops or rises, adjust the springs.
Final Check: Open and close the door 5 times. Listen for odd noises—they’re your door’s way of saying, “Hey, fix this!”
Cost Breakdown: What to Expect
Let’s talk numbers. How much to replace garage door spring depends on three things:
- Spring Type:
- Torsion Springs: $50–$200 (each). Most doors need two.
- Extension Springs: $30–$100 (pair). Cheaper but riskier.
- Labor:
- Pros charge $150–$300. Worth every penny if you value your fingers.
- Extras:
- Cables ($20–$40), safety kits ($15), or a new opener if the old one got fried ($200+).
DIY vs. Pro Cost Example:
- DIY: $120 (springs) + $40 (tools) + 3 hours = $160 and sore arms.
- Pro: $400 (parts + labor) = 1-hour nap while they work.
When to Call a Professional
Let’s be honest: There’s no trophy for stubbornness. How much to fix garage door spring issues safely often means swallowing your pride and dialing a pro. Here’s when to hit pause on DIY:
- Your Toolbox is a Ghost Town: No winding bars? Using pliers as a substitute is like performing surgery with a butter knife.
- Cables Look Like They’ve Been Through a War: Frayed, rusty, or snapped cables turn a spring job into a game of Russian roulette.
- The Door Moves Like a Drunk Penguin: If it jerks sideways or slams shut, the problem’s bigger than springs—likely bent tracks or worn rollers.
Bottom Line: If your gut says “Nope,” listen. Paying $200 now beats explaining to your insurance why there’s a spring embedded in your drywall.
Final Tips for Longevity
Want your springs to outlive your Netflix subscription? A little TLC goes a long way:
- Lubricate Like It’s a First Date: Every six months, rub a nickel-sized dab of silicone spray on the springs. Avoid grease—it attracts dirt like a magnet.
- Rust Check: Spot orange flakes? Hit the spot with a wire brush and touch up with rust-resistant paint.
- Ears Open: That faint twang when the door moves? It’s not a banjo—it’s the spring screaming for help.
Cost-Saver Bonus: Well-maintained springs last 7–10 years. Neglect them, and you’ll be googling how to replace garage door spring every 18 months.