One keypad can serve two doors only when its capacity, compatibility and location all fit.
One keypad can control two doors only when its capacity, receiver compatibility and location support both. Keep both openings visible and clear, and follow the model’s separate access assignments.
Yes—some garage door keypads can control two or more openers, but the answer depends on the exact keypad and the compatibility of each opener. The LiftMaster name alone does not establish capacity. Nor does a keypad being described as universal mean it can store assignments for several doors.
For a two-door household, the useful question is not simply “Will it open both?” It is “Can this model keep a distinct, compatible assignment for each door, from a location where both can be operated safely?” Answer that before adding another PIN or changing an existing one.
Start with the keypad’s actual capacity
Chamberlain Group’s capacity guide lists different limits for different models. Its legacy table gives the LiftMaster 877MAX a capacity of 24 PIN/opener assignments, while the LiftMaster 387LM is listed for one. The legacy Clicker CLK1D is listed for two. These examples show why capacity must be checked by model rather than inferred from appearance or brand.
The 877MAX instruction sheet, document 114A3932E, also explicitly supports programming additional openers using a new PIN for each one. That makes it a documented example of a keypad that can serve a compatible two-door installation—not a promise that every LiftMaster keypad works the same way.
| Identified model | What the cited manufacturer information establishes | Two-door implication |
|---|---|---|
| LiftMaster 877MAX | Multiple openers; separate PIN for each. Capacity guide lists 24. | Potentially suitable when both openers are compatible. |
| LiftMaster 387LM | Capacity guide lists one opener. | Do not assume a second assignment can be retained. |
| Clicker CLK1D | Capacity guide lists two openers. | Capacity alone still does not establish compatibility. |
These are identified legacy examples, not a shopping ranking or a complete current product catalog. Newer products and revisions can have different limits. Read the current documentation for the model you actually own or plan to buy, especially when replacing a keypad whose old capacity you remember.
Check each opener, not just the first one
A keypad that works with Door A is not automatically compatible with Door B. The openers may be from different generations, use different radio systems or have been replaced at different times. The brand on the door sections is also separate from the brand and model on the motor unit.
Record the keypad model and both opener models. Use paperwork or safely accessible labels rather than climbing near the mechanism to complete an identification checklist. If a manual asks for a Learn-button color or radio family, keep that information attached to the correct opener.
The 877MAX manual illustrates different programming choices for the opener types it supports. That is a reason to read the proper branch for each unit, not to repeat Door A’s button sequence on Door B without checking. A similarly colored housing or a shared installation year is not a substitute for identification.
For the broader buying decision, see the keypad compatibility guide. Here, the extra requirement is that the keypad must satisfy both compatibility checks while retaining both assignments.
Map one intended door to one distinct PIN
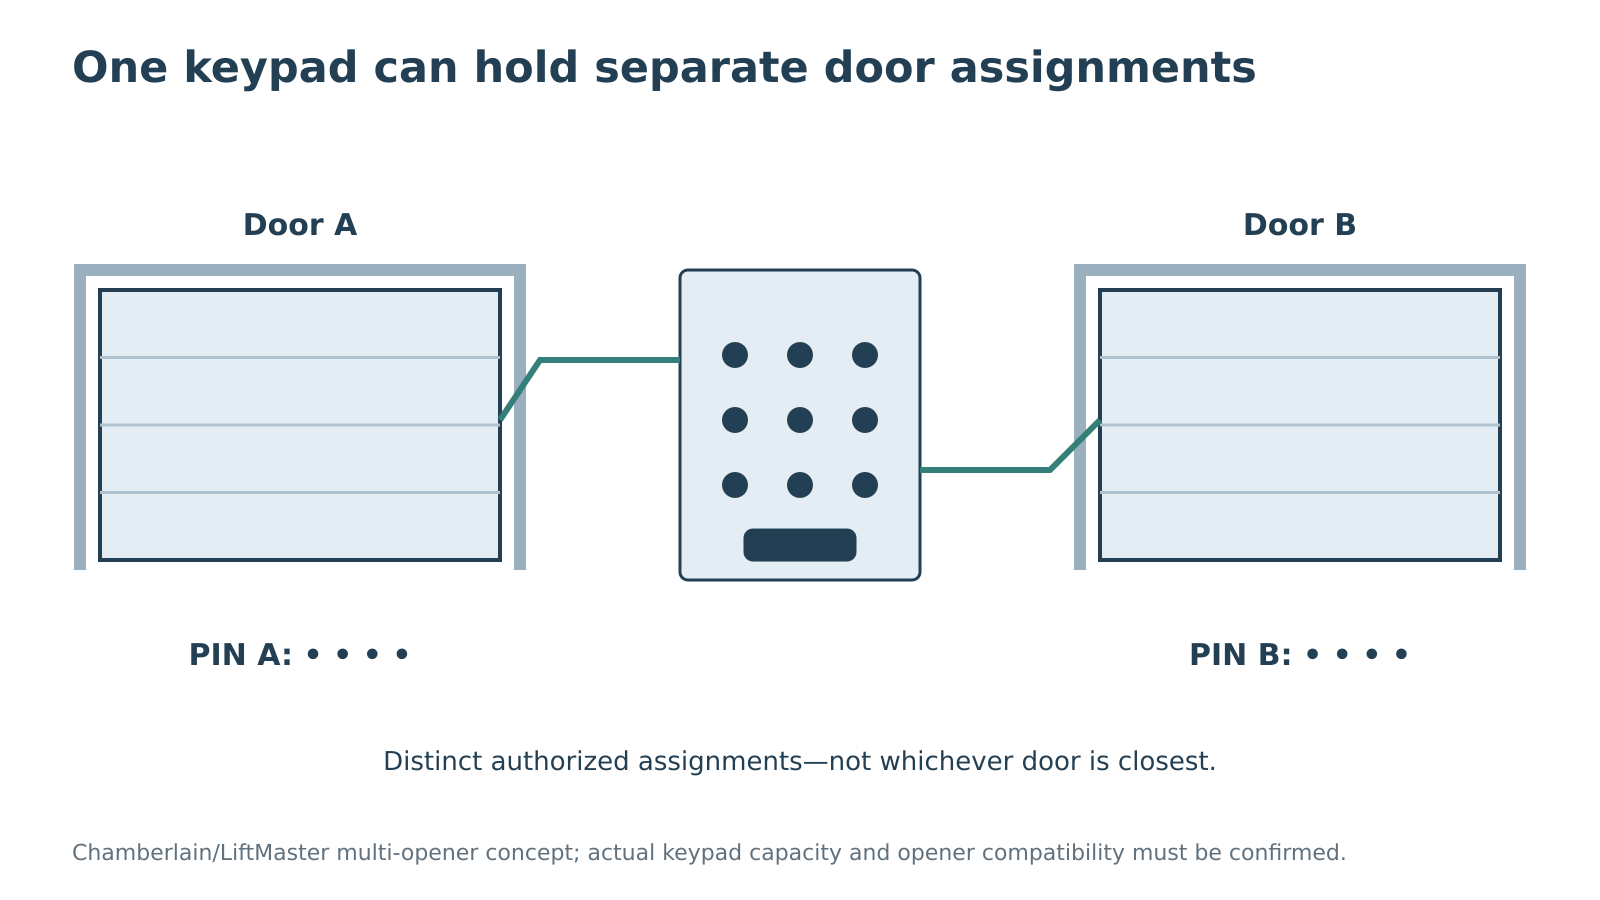 Select the diagram to view it at full size.
In the Chamberlain/LiftMaster arrangement described by the cited capacity guide, each door needs its own PIN. Think of the keypad as storing separate radio identities selected by the code entered, rather than one code automatically addressing whichever door is closest.
If you inherited an installation and do not know which code controls which door, treat that as an access-management question before adding more entries. Use the owner-authorized procedure for the exact equipment. Do not experiment with somebody else’s codes or assume that an unidentified stored assignment is yours to change.
Adding a second door is not the same as changing a PIN
A keypad manual may have separate sections for initial programming, adding another opener, changing an existing PIN, temporary access and clearing memory. Those headings describe different operations. Choosing the wrong one can change an assignment you meant to preserve.
For the 877MAX, the manual directs an additional opener through its initial-programming sequence with a new PIN. The opener-type selection and the learning step still belong to that additional unit. Use the full model instructions rather than extracting only the final ENTER press from a video.
Chamberlain’s capacity guide warns that programming beyond the supported number can replace a previously stored door/PIN. Do not test the limit by adding another entry to see what disappears. Establish the capacity first and keep the existing assignments documented privately.
Also distinguish a brief Learn-button action from a memory-erasing hold. Do not use a factory reset or a long button hold as a general way to “make room.” Erasing an opener’s stored controls can affect other authorized access devices, and the recovery work may be much broader than adding one keypad assignment.
The mounting location has to work for both doors
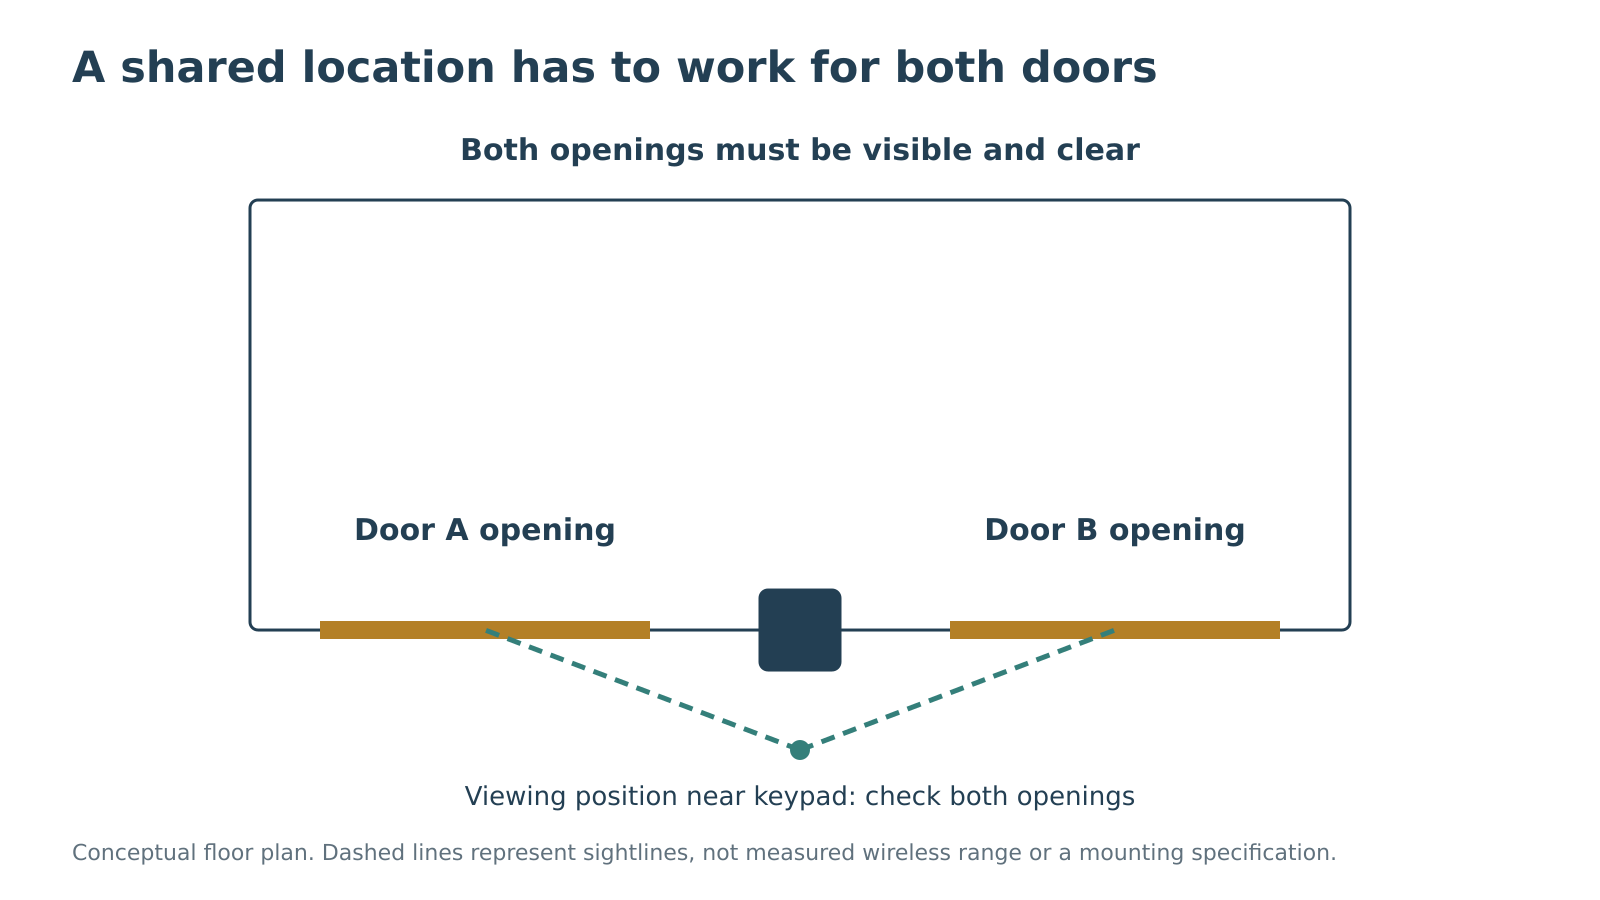 Select the diagram to view it at full size.
Manufacturer capacity is not a range guarantee. The keypad must reach each intended opener from its actual location. A unit that works beside Door A but cannot reliably communicate with Door B has not met the practical two-door requirement.
The 877MAX instructions require mounting within sight of the door, away from moving parts and out of children’s reach, at a minimum height of 5 feet (1.5 m). That is a model-specific installation example. Follow the instructions and any applicable requirements for the actual device rather than transferring a number to an unidentified keypad.
For two doors, consider the sightline to both openings—not merely the nearest jamb or the most convenient wall. Do not choose a location that encourages operating a door whose path cannot be seen. A keypad’s ability to transmit through a wall does not make an unseen moving doorway safe.
Before permanent mounting, follow the model’s permitted setup and testing process. If access or mounting is uncertain, have the installer establish the location. This guide does not provide drilling instructions or a universal wireless distance because the equipment and surroundings determine the result.
Verify the assignments independently
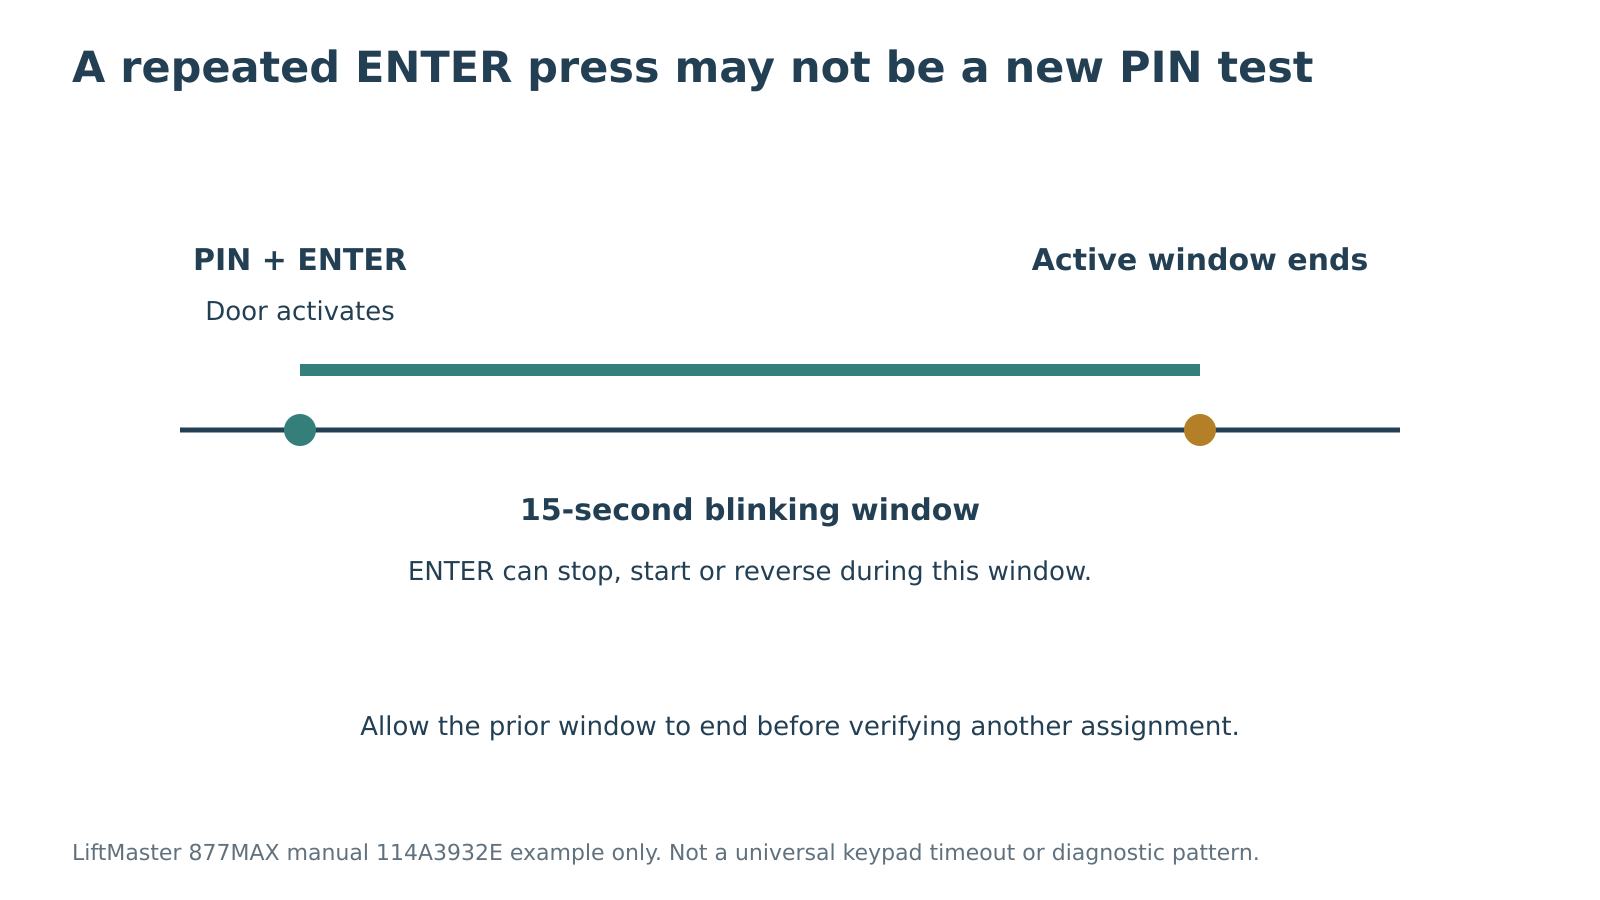 Select the diagram to view it at full size.
With both doors mechanically sound, both openings clear and the doors visible, verify one authorized assignment at a time using the manual’s procedure. Confirm which door responds; do not count a motor sound from somewhere in the garage as proof that the intended door was selected.
Pay attention to the keypad’s active window. The 877MAX manual says it blinks for 15 seconds after activation and allows the ENTER key to stop, start or reverse the door during that period. When checking a different assignment, follow the manual and allow the prior active window to end. Repeated ENTER presses are not necessarily a fresh PIN test.
If the wrong door or both doors respond unexpectedly, stop the verification and review the authorized assignment record with the manufacturer or installer. Do not keep cycling both doors while guessing which programming step went wrong. Keep people clear of both openings, not just the door you intended to move.
After setup, confirm that other authorized controls still work as intended and keep the completed assignment information in a secure place. Record model and programming changes without putting the actual access codes in a public maintenance log.
When one keypad is not the best arrangement
A one-door-capacity model, incompatible second opener or unsuitable shared location may make two separate compatible keypads the more practical choice. That is not a failure of programming; it is a mismatch between the installation’s requirements and the selected device.
Separate keypads can also make the intended door more obvious to users, but each still needs appropriate placement and access management. Compare the arrangements by compatibility, sightlines and clear operation rather than assuming that fewer devices is always better.
If the keypad previously worked and now fails, the keypad symptom guide is the better starting point. For an unresolved receiver or operator concern, see opener service. A successful two-door setup is one where the documented model supports both assignments and each authorized input reliably selects the intended door.